I am supposed to be updating my CV. It needs to be done by 9 May and I thought the long May Day weekend would be a suitable time to tackle the task. And it is certainly a task that needs tackling. I've not updated it since about 2001, the reason being that all the jobs I've had since then have involved an application form and so my CV has become redundant. Except that now I need one, it feels like a Herculean task to update it.
So, when faced with a big challenge, what do I do? I find other things to do of course! Having found Mad Men on Netflix I decided that I would play catch-up with the final two series. I read the other week that the main rival to Netflix is sleep and I almost agree. What is it with binge-watching television series? It really is the crack cocaine of entertainment!
However, I have been fairly strict with myself (who am I kidding?), setting myself the task of achieving something from my to-do list between episodes. So far I have been to the Post Office and visited every charity shop on my local high street. For the record, there are seven. I know it is only April but this year craft club have agreed to do a Secret Santa where the gift has to come from a charity shop. The budget is £5. I have drawn a name from the hat and, in unhelpful but typical ElleAyJay style have something quite specific in mind. I'm therefore trying to visit charity shops at every opportunity. This weekend was my first proper attempt at the 2017 search and I came home empty handed but was inspired with a plan B if my plan A fails to materialise.
I have also done three loads of laundry, including the door mats and cat blanket (was that third load really necessary?); vacuumed the house (that really was necessary!); trawled reviews to find a yoga app so that I can attempt to be a relaxed, stress-free individual and free from back pain at the touch of a button (well, I can dream can't I?); completed a personal impact opportunities and challenges analysis (don't ask!); and (my proudest moment) changed the side light in my car's headlamps (thanks YouTube!).
After all that the to-do list was getting pretty thin so I went off-list, which is always dangerous, and I made a cake. I made it once before at the end of February when I had a day off and a fruit bowl full of very ripe bananas. I was due to visit friends at the weekend so I knew the bananas wouldn't get eaten but would be horribly over-ripe by the time I got home. The solution was to make Banana Bread and take it with me to my friends'. It went down very well so I kept the recipe on my phone. The only trouble is, every time I open my internet browser the recipe is there, staring at me, and that is what happened today.
Now the problem is how to ensure I don't eat the whole loaf myself. It would seem by best option is to have a day out with the family tomorrow and take it along, although that means I won't be able to send time developing my CV. Darn it, things were going so well too! I shall have to console myself with a couple of episodes of Mad Men tonight.
Sunday, 30 April 2017
Sunday, 23 April 2017
Blueberry Cake (gluten-free!)
Inspired on a recent trip to Finland, I was itching to try to recreate a blueberry cream sponge cake and yesterday's craft club gathering was just the excuse I needed.
I have to admit that I had never before attempted to make a traditional Victoria sponge cake in gluten-free form. Gluten-free baking tends to be pretty heavy. This is because gluten in wheat flour is the the protein which gives any sort of dough its stretchy texture - ideal for stretching around bubbles of air for lovely light sponges or bread. This tends to mean that you have to add other stuff to try to recreate this elasticity, often without much success. Gluten-free flour is also very water absorbent and so the results can be dry and crumbly. However, the chef in Finland had made a fabulous gluten-free sponge cake so I just had to give it a go!
My cake tins are fairly large (20cm diameter and 4cm deep) so I ended up making a '3-egg-sponge'. I began by weighing my chosen three eggs (223g) and used this weight as the basis of the rest of the ingredients.
I used an electric hand whisk to beat 223g Stork margarine 'for cakes' (lighter than butter so helps to produce a lighter sponge, and recommended when using gluten-free flour) with 223g caster sugar until I had a light, creamy texture. I then beat in the three eggs and a teaspoon of vanilla bean paste. I then added 223g gluten-free self-raising flour, 1 and a half teaspoons of gluten-free baking powder, half a teaspoon of xanthan gum (helps with the elasticity) and five tablespoons of milk (helps with the dryness) to the mixture and gently but thoroughly folded it in. The mixture looked quite sloppy and almost curdled at this stage but I ploughed on by dividing the mixture between the two lined cake tins, carefully levelled out the mixture and popped them into the oven, preheated to 170C fan / 190C ordinary oven / gas mark 5. I tested them after 20 minutes to see if a skewer inserted into the centre came out clean but ended up leaving them for a further 5 minutes.
Once out of the oven I cooled them on a wire rack and well away from any four-legged furry friends (lesson learnt from a previous disastrous experience - well, disastrous for me, but the cat was very happy indeed!)
When it came to the assembly, I whipped 300ml double cream until the 'soft peaks' stage. Put about a third of it into a piping bag before mixing a very generous amount of blueberries (at a guess about 250-300g) into what remained in the bowl. I decided to use frozen (defrosted) blueberries for this bit as I was keen for some of the juice to seep out into the cream to make it a bit pink and also slightly more juicy. I heaped this over the top of one of the cakes before putting the other cake on top.
I then took about 2 tablespoons of salted caramel sauce (from a jar), slackened it off by adding a dash of boiling water until it was a spreadable consistency, and covered the top of the cake with a thin layer, leaving a 3cm caramel-free ring around the outside of the cake. Onto this I piped the remaining cream and topped each 'blob' with a fresh blueberry.

The result proved very popular and I'm not sure you could tell it was gluten-free - but not having eaten a similar cake that contained gluten for at least 17 years who am I to judge! However, I think this sponge recipe could become a new favourite.
Sunday, 9 April 2017
Jewellery Pouches
At Christmas I discovered that my Mum keeps her jewellery in a re-purposed ice-cream tub where it all gets tangled up. I was therefore on a mission to make her something more suitable as a Mother's Day gift. March craft club gave me the perfect opportunity as she was out of the country and so I could finally make something without her knowledge.
Inspired by a small felt pouch I keep two special necklaces in, I dug out my felt supplies and the button box and started playing around with colour combinations. In the end I settled for some large wooden buttons printed with blue flowers, some navy blue and sky blue felt, and some petrol blue embroidery thread.
I took a square of the sky blue felt and folded it in half. I then used this to cut some navy felt the same width but slightly longer so that the finished pouch could be closed with a flap and secured with one of the buttons. Lining up the two folded bits of felt I then sewed around the edges. All that was left to do was to decide on the position of the button, sew it on and cut a button hole.

This arrangement of folded felt gave the finished case three separate pouches - between the fold of the sky blue felt, between the fold of the navy blue felt, and also in the middle between the navy and sky blue felt. Hopefully, this will help separate items and prevent tangling. I then repeated the process in miniature to make a matching pouch for earrings and rings.


I'm pleased to say that my Mum is now back in the country and was delighted to receive the jewellery pouches as a belated Mother's Day gift. Not only will it be a vast improvement on the ice-cream tub but will hopefully also allow her to travel with a selection of necklaces and earrings.
Come to think of it, perhaps I should make myself a set too!
Sunday, 2 April 2017
Hapa Zome Leaf Prints
A few weekends ago my friend's 9-year-old daughter wanted to share a new craft with me. She called it Japanese Leaf Printing but that was all I was told except that we first needed to go for a walk to find our leaves.
Intrigued, I joined the family in putting on coats, hats and gloves (it was a wet and windy day) and went out in search of suitable leaves. I was instructed to look for nicely shaped leaves that were fairly fleshy but not at all waxed. So, grass, nettles, dock leaves, bracken were good; ivy, holly, gorse were bad although I did sneak in some gorse petals as I was keen to try some colour.
Back at home we gathered together our leaves along with a chopping board, a couple of sheets of card (this need be nothing special so bits of an empty cereal box would work fine), two squares of white fabric (ours were cut from an old sheet) and, most importantly, a hammer. Using the chopping board as our base we then layered our other items beginning with a sheet of card, a sheet of fabric, our leaves arranged in an attractive fashion, the second sheet of fabric and, finally, the second sheet of card.
The fun then began. Using the hammer you just pound the pile of card, fabric and leaves. Do so in such a way as to ensure you apply equal pressure evenly across all areas where there are leaves but be careful not to disturb the layers of card, fabric and leaves as you pound.
I have to say that, at this point, I was fairly sceptical but once all the hammering was over I was pretty amazed to see the results revealed. Carefully remove the top layer of card and fabric and then, even more carefully, remove the now pulverised leaves.
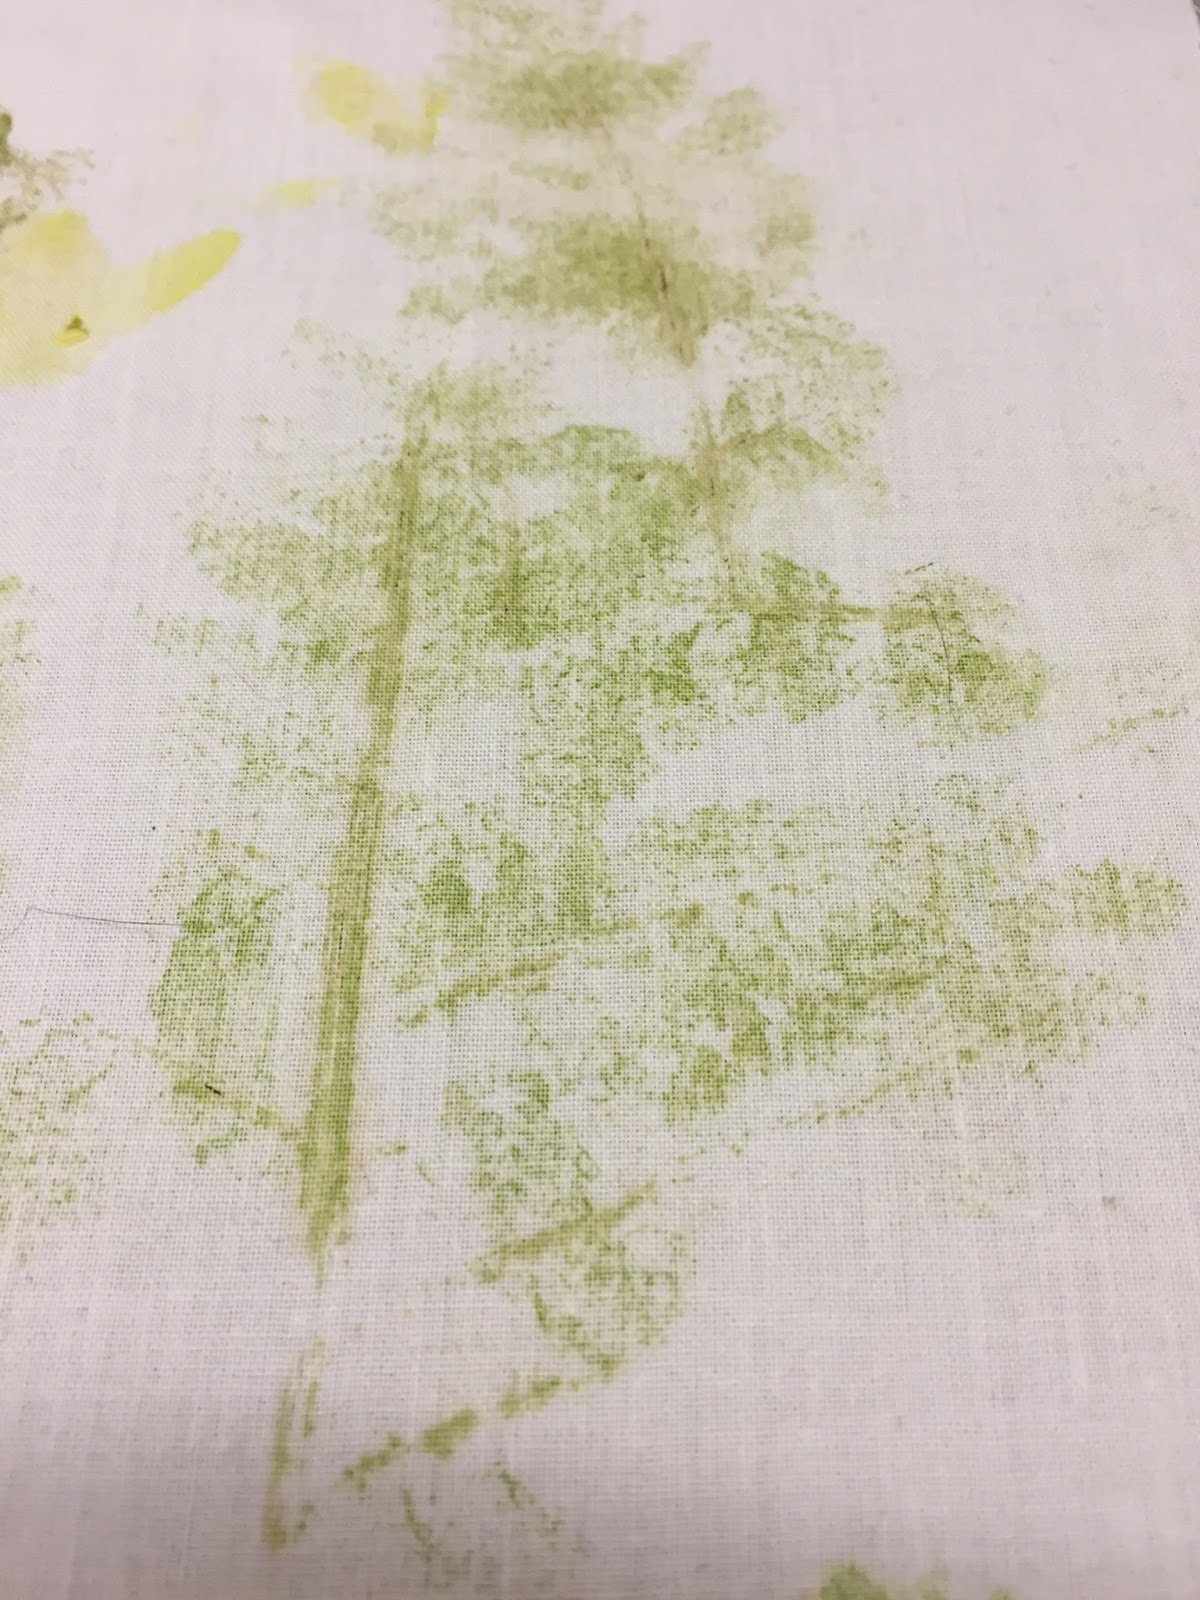
Not only do you get leaf shapes imprinted as the chlorophyl leaches into the fibres of the fabric, but some leaves also revealed the most intricate details. Passing a hot steam iron over the finished results is supposed to help fix the image but, this being all natural, the colours will fade over time. Also, the bottom layer of fabric seems to pick up the leaf definition better than the top.
My friend's daughter gave me the top layer to bring home as a souvenir. The first image is of a bracken leaf with some hints of the gorse petals I snuck in at the top. The second image is of a nettle.


I was so impressed that I showed a friend. We were in my kitchen and it was dark outside so I demonstrated using the herbs from the windowsill. The thyme and parsley left my friend speechless (and also smelled great when being hammered!)
I've since found out that the Japanese name for this type of printing is Hapa Zome but that many cultures around the world have been using this method for extracting dye or colour for centuries. Other examples I've seen on the internet are much more vivid so I guess you could be a lot more forceful with the hammer than I was. Just make sure you have a very solid foundation such as an unbreakable floor.
Do give it a go!
Intrigued, I joined the family in putting on coats, hats and gloves (it was a wet and windy day) and went out in search of suitable leaves. I was instructed to look for nicely shaped leaves that were fairly fleshy but not at all waxed. So, grass, nettles, dock leaves, bracken were good; ivy, holly, gorse were bad although I did sneak in some gorse petals as I was keen to try some colour.
Back at home we gathered together our leaves along with a chopping board, a couple of sheets of card (this need be nothing special so bits of an empty cereal box would work fine), two squares of white fabric (ours were cut from an old sheet) and, most importantly, a hammer. Using the chopping board as our base we then layered our other items beginning with a sheet of card, a sheet of fabric, our leaves arranged in an attractive fashion, the second sheet of fabric and, finally, the second sheet of card.
The fun then began. Using the hammer you just pound the pile of card, fabric and leaves. Do so in such a way as to ensure you apply equal pressure evenly across all areas where there are leaves but be careful not to disturb the layers of card, fabric and leaves as you pound.
I have to say that, at this point, I was fairly sceptical but once all the hammering was over I was pretty amazed to see the results revealed. Carefully remove the top layer of card and fabric and then, even more carefully, remove the now pulverised leaves.
Not only do you get leaf shapes imprinted as the chlorophyl leaches into the fibres of the fabric, but some leaves also revealed the most intricate details. Passing a hot steam iron over the finished results is supposed to help fix the image but, this being all natural, the colours will fade over time. Also, the bottom layer of fabric seems to pick up the leaf definition better than the top.
My friend's daughter gave me the top layer to bring home as a souvenir. The first image is of a bracken leaf with some hints of the gorse petals I snuck in at the top. The second image is of a nettle.

I was so impressed that I showed a friend. We were in my kitchen and it was dark outside so I demonstrated using the herbs from the windowsill. The thyme and parsley left my friend speechless (and also smelled great when being hammered!)
 |
| A sprig of thyme |
 |
| Coriander (left) and Parsley (right) |
I've since found out that the Japanese name for this type of printing is Hapa Zome but that many cultures around the world have been using this method for extracting dye or colour for centuries. Other examples I've seen on the internet are much more vivid so I guess you could be a lot more forceful with the hammer than I was. Just make sure you have a very solid foundation such as an unbreakable floor.
Do give it a go!
Subscribe to:
Posts (Atom)