Saturday 25 April 2015

A Couple of Blankets for a New Couple

Today my friends are getting married and next week will be heading off for a five-week honeymoon to Spain and France in their newly converted camper van. I couldn't let them go empty-handed so I've made them each a blanket and a hot water bottle cover.

Now, I know what you may be thinking, a honeymoon is supposed to be a romantic holiday and should not require blankets and hot water bottles! They are also heading south, and France and Spain in April and May should be nice and warm. However, hot weather is certainly not guaranteed and however hot it is during the day, clear skies at night can be cool. Surely it's far more romantic to be sitting out under a cosy blanket with a glass of something and admiring the stars than cooped up inside feeling a little on the cool side of comfortable? And if it's that hot, the blankets can always be sat on rather than under! Besides, if the blankets don't get used in on this trip, I'm sure they will come in handy for camping adventures closer to home.

Anyway, having confirmed their favourite colours - orange, and yellow or green - I've been busy sewing. In fact, I've already featured the hot water bottle covers which I made at craft club in March. I decided to risk featuring them in the blog believing that my friends would be far to busy planning a wedding and honeymoon to be keeping a regular eye on my web ramblings.

I'm now pleased to be able to share the finished blankets.


Better dash - I've got a wedding to go to!

Sunday 19 April 2015

Polenta Crust - a gluten-free alternative to pastry

With my parents coming for lunch yesterday, I was looking for something interesting to make that could use up one of three butternut squash that was sitting in my fruit bowl. I soon found a Nigel Slater recipe for a butternut squash and feta tart and decided to adapt it.

The first task was to make a gluten-free substitute for the pastry base. Making up pastry with gluten-free flour is easy but the resulting dough is very hard to handle. In normal pastry the gluten allows the pastry to stretch, so rolling it out, picking it up and placing it into a tart tin is relatively easy. Gluten-free pastry completely lacks this stretch and tends to be very sticky. Some suggest rolling it out between sheets of cling film but you still end up trying to manhandle this into the tin with varying degrees of success. Or at least I do. I was therefore interested to see if there was something else I could try, which is when I came across a recipe by Donna Hay for a polenta crust tomato tart. I've not heard of Donna Hay before but I understand from a friend that she is very big in Australia and New Zealand and I will certainly be keeping an eye out for recipes from her from now on.

Her polenta crust recipe seemed to be very easy indeed and didn't involve having to rest the polenta dough in the fridge for half an hour, which is generally the rule for all pastry (gluten or no gluten). All you had to do was whizz 170g instant polenta, 75g plain flour (I used Dove's Farm gluten-free) and 75g soft unsalted butter together with 80ml water and a pinch of salt in a food processor until it formed into a dough - a matter of seconds. Then tip this out and press it into a loose-bottomed tart tin. I found spreading the mixture evenly around the tin was easiest done with the back of a spoon. I then lined the pastry with non-stick baking paper, tipped in some baking beans (actually, I use rice) and baked it in the oven (200C, 180C fan, gas mark 6) for 15 minutes before removing the paper and beans/rice and baking for a further 10 minutes or so until it was crisp.  It had a beautiful golden yellow colour.

Meanwhile, I had been further adapting Nigel Slater's recipe swapping his suggested ingredients with what I had to hand. I peeled, diced and steamed the butternut squash until tender; cut 150g hard goats cheese into small cubes; whisked 2 eggs with 100ml of half fat créme fraîce, 100ml double cream, some chopped fresh thyme, and some salt and pepper.

Once the polenta crust was cooked, I added the cooked diced squash and diced cheese, packing it fairly tightly into the crust before pouring over the egg and cream mixture and sprinkling the top with 40g finely grated Parmesan. I then carefully lifted the tin onto a baking tray and baked it in the oven (180C, 160C fan, gas mark 4) for about 35 minutes. The butter from the polenta crust did ooze out of the bottom of the tin so having it on a baking tray was essential. It may also help with any leaks or spills of the cream mixture as you transfer the tart to the oven.

Anyway, the result was great. I'll certainly be using the polenta crust again and I'm sure it would work for a sweet tart if you replace the pinch of salt with a pinch of sugar.


Sunday 12 April 2015

Florentines and a new e-mail sign-up

Tomorrow I return to work after a wonderfully relaxing two-weeks off. Normally when colleagues have been on holiday, they returning bearing gifts: Turkish Delight; Japanese savoury snacks; Swiss chocolates; Irish fudge; French madeleines. I feel I shouldn't return empty-handed, not least because a select few have been holding the fort over the Easter break and deserve a thank you.

However, since I've not been away I've not had the opportunity to purchase any exotic foods. Even when shopping in Bath I was too focused on buying shoes; and during my four, yes four, trips to various garden centres I was also rather pre-occupied with getting things to grow rather than things to eat.

Anyway, really it's just a good excuse to produce something from my own kitchen, since that is where I have spent a lot of time over the past two weeks. After poring over various recipes I settled down to attempt some mini honey-nut Florentines.

For these you need to mix 100g chopped candied peel and 10-12 glacé cherries that have been halved or quartered.  To these add 75g blanched almonds and 50g pistachios both roughly chopped. Melt 75g unsalted butter in a small pan and then stir in 75g caster sugar, 1 tablespoon of honey, 1 tablespoon of double cream, and 1 teaspoon of vanilla extract. Bring to boil, stirring all the time, and simmer for 1-2 minutes, before removing from the heat.

To the sugar and butter mixture, stir in the nuts, cherries and peel, along with 2 tablespoons of plain flour and the finely grated zest of an orange.  Leave until barely warm.


Meanwhile, heat the oven to 180 C, fan 160 C, gas mark 4 and butter the bases of two, twelve-cup muffin tins.  The latter will not win you any points on the Great British Bake-Off but will stop your Florentines spreading to ridiculous proportions when in the oven. If you are entering a Bake-Off just line two large baking trays with non-stick baking paper.

Once the mixture has almost cooled to room temperature, press a teaspoon of the mixture into each of the muffin tin holes or place 12 drops of mixture onto each of the baking trays, leaving plenty of room for them to spread out.  Pop them in the oven for 10-12 minutes.

Allow them to cool in the tin or on the tray for about 10 minutes before transferring them to a clean kitchen towel.  If using the muffin tin you'll need to prise them out with a knife.  Make sure you place them upside down onto the towel.  You want the smooth side facing up.


Once cooled, melt 100g dark chocolate and 100g white chocolate in separate bowls.  Spread 12 of the upturned faces of the Florentines with the dark chocolate and the other 12 with the white chocolate.  When slightly cooled, you could wiggle the tines of a fork through the chocolate to leave a wave pattern. This really is easier said than done but I distinctly recall that Paul Hollywood and Mary Berry insisted on this finishing touch in the last Bake-Off. However, if like me, you've made your Florentines in muffin tins you're already out of the running for 'best looking Florentine'. I left the dark chocolate too long, missing the opportunity, and made a bit of a mess of the white chocolate but I've decided mine are to be all about taste. Let's just hope my colleagues agree!


The very observant amongst you will have spotted a new Follow by email box to the right-hand side of the page. This has appeared after feedback from people who like reading the blog but would quite like an alert whenever I post a new blog. To save you randomly checking to see if I've posted anything new, you can now register your email address and you will automatically be sent an email whenever I post a new blog. The email should appear from ElleAyJay (noreply+feedproxy@google.com) so you may need to check your junk filters or add this email address to your contacts so that you don't miss the email (as well as the new blog). Do let me know if you find this helpful of if there are any technical issues with it.

Thursday 9 April 2015

Upcycling

A dress has been hanging in my wardrobe for the past 22  years. I made it for my brother's wedding and can't remember if I have warn it since. It has long gone out of fashion and is also now a saggy fit, thanks to the fact that I am no longer a poor student living on carb-rich pasta, tuna mayo sandwiches, Toffee Crisps and biscuits!

Hurrah for the latter but I continue to really love the fabric which is why I still have it. I really want to use the fabric to make myself an appliqué blanket but can't lay my hands on any dark grey fleece, especially now that the weather is getting warmer and the shops are full of summery cottons. However, when my lovely friend C moved back to New York at Christmas she left me her plain, dark grey duvet set (thank you, C!). Surely there would be something that I could do with the two?

I thought I'd better check the definition of 'upcycling' before I proceed any further with this post, since I wasn't convinced that turning a duvet cover and pillow cases into..... a duvet cover and pillowcases really counts as upcycling. However, it turns out that it does: "the process of turning waste materials or unwanted products into new materials or products of better quality or for better environmental value."  I think both the dress and duvet set count as unwanted in their current form (unworn for 22 years and left behind) and I'm hoping that the end product will be of better quality, or at the very least, more aesthetically pleasing.

Take one dress...

...and one plain grey duvet set

The dress contains a lot of fabric but much is in fairly long but narrow panels, hence there really wasn't an option to turn it into another dress, top or skirt. However, I am hoping that I can cut out enough small shapes to adorn both the duvet cover and pillow cases with enough for an appliqué blanket when I can lay my hands on some grey fleece.

For now, I'm just testing out new appliqué shapes. I have drawn out a rabbit based on a silhouette I saw in a painting but need to enlarge it, which will have to wait until I can get my hands on a scanner next week.  It's currently drawn out on A4 paper but a king size duvet cover is no small area of fabric to cover and so I feel it needs to be larger.  I don't trust myself to redraw it quite so well a second time hence I'll be calling on technology to do that for me. I'm hoping to use the bottom back panel of the dress, which has a flare to it so should just about be wide enough to fit the rabbit shape.


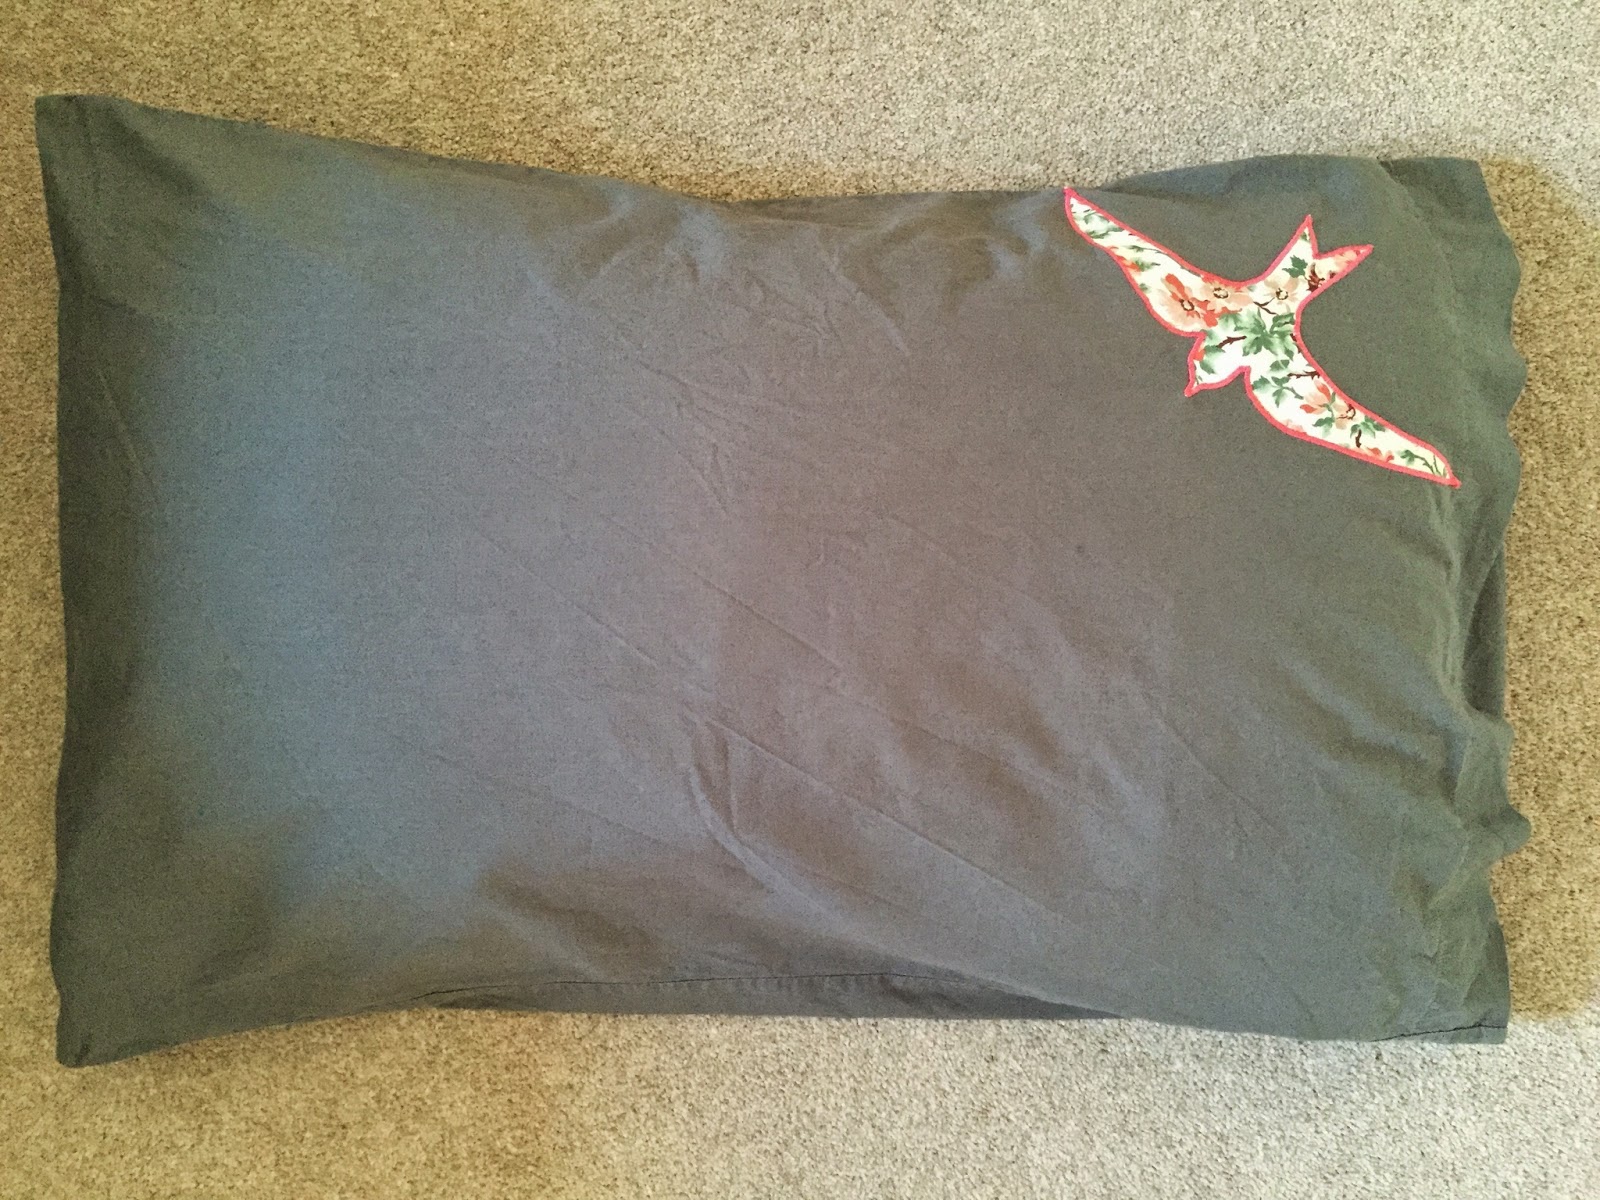
And since the rabbit is looking up, he really needs to be looking at something. Still on my bird theme, I've chosen some flying birds - swallows to be precise - but was a bit concerned that the numerous points would make the shapes hard to sew around with the appliqué zig-zag stitch. There was only one way to find out - do a test.


Pleased with the results so far - I managed the wing and tail tips fairly well - I'm off to cut out some more bird shapes and can't wait to make the rabbit bigger so I can complete the project.

Friday 3 April 2015

Paper Garland

Last Saturday was a bit of a revelation. I had read a short magazine article about the regeneration of Frome in Somerset. It talked about the abundance of independent shops and about a fabulous independent market. With a friend coming to stay for the weekend, what better excuse than to have a day out to see for ourselves.

Frome is only about an hour's drive from Bristol but I have to admit that I'd never actually visited before - just seen its name on road signs as I was travelling elsewhere. I was also a bit wary that magazine articles can make even the dreariest of places seem great, and vice versa. However, we were certainly not disappointed.

Once we'd found the long-stay car park and deliberated how long we would need - three hours for £1.90 or do we push the boat out and go for four hours for £3.40 - and been slightly alarmed by the public toilets that talk to you once you're locked inside, saying that your visit is time-limited but neither telling you how long you actually have nor what happens when your time is up, we began to explore.

Thanks to a sudden downpour we headed immediately for the Cheese and Grain, a community centre and cafe that was hosting a craft market. There must have been about 25 stalls with a wide range of crafts: stained glass, jewellery, wood turning, skincare products, painted silk, paper crafts and it wasn't long before we were reaching for our hard-earned cash. One stall holder had some fabulous notebooks that were made from old comics, annuals, sheet music, maps and the like. They were really beautiful and totally unique. She had also made some paper garlands by sewing together discs of paper - simple yet very effective. I'd seen such garlands before and been wanting to try them myself so had a quick chat to pick her brains.

From the craft market we headed through the Saturday morning food market. Although it was coming to an end we still had time to purchase some wonderful British cheeses, freshly made sausages, and some Spanish 'nibbles': spicy fried corn, habas fritas (fried broad beans) and lemon pepper cashews. All have since been consumed and all will be repeat purchases!

Next stop was the high street and to find St Catherine's, which was featured heavily in the magazine article. Fortunately Frome town centre is very small and has good sign posts so it wasn't long before we found it and, in particular, The Garden Cafe, an organic, vegan cafe and deli that we had read about and decided would be a perfect lunch stop. It didn't disappoint and we had to tear ourselves away to explore the shops further up the hill, which also far exceeded our expectations. We ended up having to curtail our trip long before we would have wanted - it turned out four hours just wasn't long enough! We learned that all the independent traders take part in the Frome Independent Market, which takes place on the first Sunday of the month, so I shall definitely be making a return visit!

Inspired by my trip to Frome and whilst taking a break from blanket-making and gardening, I decided to have a go at making a paper garland. I remembered that I had some paper stars lurking in my craft cupboard following an aborted Christmas project a number of years ago. I thought they may be a good test. Turns out stars aren't a great shape to sew as the points have a tendency to get poked into the sewing machine by the needle. However, as the famous saying goes, if at first you don't succeed, try, try again!

The second attempt was slightly better but, if I'm honest, far too fiddly to be able to consistently get a good result.


My third attempt was more along the lines of the ones we saw in Frome.


It's a bit plain but could make an interesting 'ribbon' to contrast a plain coloured gift wrap or, as I have here, draped over a mirror. Surely there's a Christmas version I can come up with?