Monday 24 November 2014

Summer Bag - farewell

Autumn has definitely arrived and so any journey outside involves a warm and preferably waterproof coat, having an umbrella to hand if not in hand, and occasionally a hat and gloves. This change in wardrobe also, for me, involves a change in bag.

Gone are the carefree days when a bag slung over the shoulder is a practical option. Bulkier clothing invariably means the bag doesn’t really stay on my shoulder and when you then add in wrestling with an umbrella in the elements or removing gloves in order to find door keys I tend to seek something that, once shouldered, stays put.

It is therefore with some sadness that I say farewell to my summer bag and dig out my more muted but practical and hands-free cross-shoulder option. But before it spends the next 5 months in the cupboard I thought it was a good opportunity to share it with you, not least because it is hand made, but also because it also got quite a few compliments this year.


I would love to say that the bag was meticulously designed from the outset, but the reality is the design evolved slowly. It started a number of years ago when a friend returned from a business trip to Tallinn, Estonia with a gift of two balls of rainbow-dyed yarn. It was 100% wool but treated in a very different way from a ‘normal’ ball of wool you’d buy to knit or crochet with. Without getting too technical, not least because I don’t really know any great detail of what happens between shearing the wool off a sheep to buying it in a shop to knit with, this wool was different in a number of ways. Although dyed and carded (a process that disentangles, cleans and intermixes fibers to produce a continuous web or sliver suitable for subsequent processing*), very little else had been done to it. A gentle pull of the yarn, a normal process when knitting or crocheting to unravel a length from the ball to knit with, just resulted in the strands breaking. I occasionally pulled out bits of grass or grass seeds from the strands and my hands were always beautifully soft every time I worked with it indicating that hardly any of the lanolin (natural oils in sheep wool) had been washed out.

Anyway, the volume of wool I had and the huge fragility of the strand led me to one conclusion – it would be perfect for felting or making ‘boiled wool’. This would help deal with its fragile nature but only if I could knit it into a shape first. This I did carefully and whenever a strand broke I resisted tying a knot and just placed the two broken strands side-by-side and kept going. I’m sure this would have just unravelled if the knitted material was the final product but I knew the ‘boiling’ process would hide any loose strands and really ‘knit’ the fabric together. I cast on a random number of stitches and knitted away in stocking stitch (knit a row, purl a row) until I ran out of yarn.

I ended up with a very flimsy and fragile rectangle about 50cm square. It was only then that I thought it may make a bag of some sort but the next step was to felt or boil it. This was a complete act of faith because I tossed it into the washing machine and turned the temperature dial up to 95°C. Fortunately, this resulted in a lovely, rainbow-hued rectangle of boiled wool but with a slightly curled edge on what was the cast-on and cast-off edges – now measuring about 40cm square.


The rest was pretty straightforward. I joined the side seams and then sewed across the bottom corners to give the finished bag a third dimension. I made two strips of cotton into the handles and sewed them onto the wool.  For the inside of the bag I took a piece of fabric that approximately measured the same size as the original piece of boiled wool and joined it at the top with a zip and a second one that was slightly shorter.  I placed the shorter one inside the larger one and sewed up all the side seams before slip stitching into the main bag opening around the zip. This gives the bag three internal compartments as the smaller zipped section essentially divides the main lining into two.


I hope you love it as much as I do. Just don’t ask me to make another, or if you do, don’t expect it to turn out the same!

*With thanks to Wikipedia!

Monday 17 November 2014

Duvet Cover

I always seem to struggle to find a duvet cover that I like. The last purchase was a desperate one since the existing pillowcases and duvet cover had become threadbare and now another set of pillowcases looks set to follow suit.

Yet again I was inspired by the Lotta Jansdotter book (the one with the apron pattern), which explains how to make a double duvet cover out of conventional width fabric. It seemed straight forward enough so my next challenge was to find some fabric I liked that also wasn’t too expensive, since you need quite a lot! This is where Ikea came to my aid. I’d already fallen for their Evalotta fabric by designer Malin Ã…kerblom – the background colour suiting the accent colour I have in my hall and landing. With a lot of help from a friend with a tall ladder, great DIY skills and a head for heights I have managed to cover a whole wall on the upper staircase with it. It being one of the first things I see when I venture out of the bedroom each morning, it certainly brings a smile to my face (which the previous bare wall did not!)

I also liked Malin’s Evalena fabric but couldn’t think where it would go in the house. Of course, that was until I decided I could make my own duvet cover. The fabric is heavier than conventional sheeting so I didn’t think it would make a great duvet cover if used for the whole thing so this is when I decided to use it for a key section of the top cover, with other cotton (also from Ikea) for the sides and underside. Lotta's instructions use the fabric running width-ways across the bed, but this wouldn’t work with the Evalena pattern. Also, the instructions assume you are using all the same fabric or at least fabrics that are the same width. Unfortunately Evalena is 150cm wide and the red cotton is only 140cm wide. This meant that I spent some time with pencil and paper trying to work out the best arrangement of strips of red both aesthetically and economically.

Anyway, last weekend I put all the theory into practice – easy in terms of sewing but a bit of a faff trying to find floor space big enough to lay out pieces of fabric to measure over 2 metres square, one of which starts out over 6 metres long. However, it was done in an afternoon and I then finished it off this weekend by turning the small strip of red that I had left over into two pillowcases.


I’m so pleased with the result. I also now won’t have to wait until I exit the bedroom to see the birds to break into a smile – surely you can’t resist smiling at those bees and bugs?!


Monday 3 November 2014

Apron

A few years ago a friend was having a bit of a clear out in order to turn her craft room into a nursery and she passed on a book of sewing patterns by Brooklyn-based Scandinavian designer Lotta Jansdotter. It mostly contains patterns for household accessories such as oven mitts, place mats, a range of bags suitable for carrying anything from books to garden tools to a yoga mat, a duvet cover, desk tidy... hopefully you get the general idea.

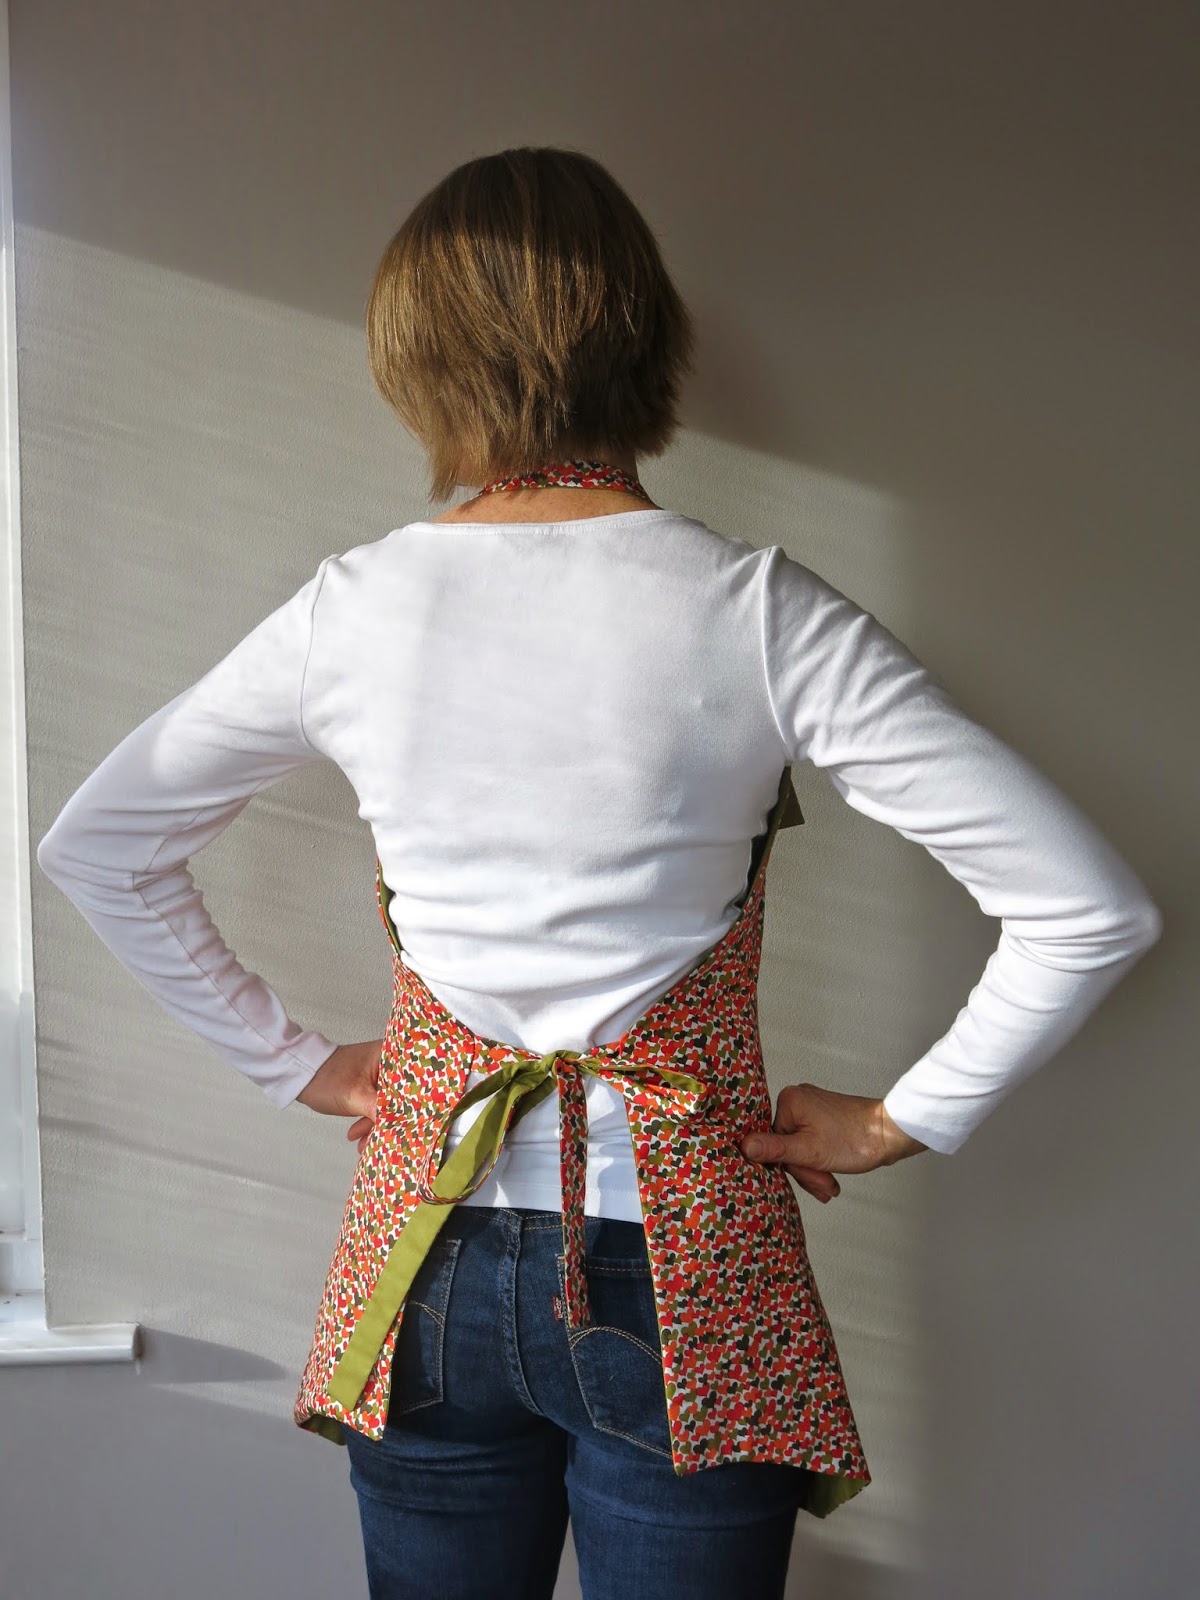
One of the patterns is for a double-sided or reversible apron which is a really lovely design. That may sound odd for an apron but it is more than just the usual flat shape and ends up being quite flattering (for an apron!) It is fairly short but the addition of curved side panels gives it ample width and a bit of shape that turns it from being ordinary to something that you wouldn’t mind answering the front door wearing. I made one for myself a few years ago out of denim and red and white gingham, which received lots of complements from the craft club ladies. In fact, a few said I looked as if I was dressed for a party!

So, with the birthday of one of the crafty ladies rapidly approaching and a metre of fabric sitting in my fabric box that I knew she’d like, I set about making her an apron. Lotta’s pattern includes an applique design for a vase and flower but I used one of my own from the butterfly blanket.

Also, the original pattern has two straps at the top that tie at the back of the neck but I find having a knot at this point uncomfortable.  I therefore replaced these with a single strap on one side and a pair of D-rings attached by a short loop of fabric at the other so the neck loop is fully adjustable.


Anyway, huge thanks to Ce my fantastic photographer. Now all I have to do is wrap it up in time for the next weekend’s birthday-themed crafty gathering!