Thursday, 14 May 2020

Face masks

As the pandemic lockdown begins to lift in the UK I thought that I had better get organised. Imagining that there will probably be some situations where face masks are required to be worn and with medical standard masks in short supply and, rightly, reserved for medical professionals, care workers and vulnerable individuals, I decided to make some.

A few weeks ago someone shared a link to the Centers for Disease Control and Prevention website - an organisation in the US.  Not only do they have a very helpful section on how to properly put on, wear, and take off a face mask safely, but a few ways that you can make one.

There are a number of no-sew options but I decided to give the version that required sewing a go - not least because it gave me a good excuse to dig out all of my fabric!

In the end I made 12 masks but only had appropriate elastic for three.  I have posted four masks to my parents as my Mum said she had some elastic so I'm now on the hunt for suitably narrow elastic. I guess I could always repurpose some elastic bands but don't relish the thought of getting the rubber caught up in my hair (ouch!)


With an outing scheduled for Saturday where wearing masks is compulsory, it seems that my project was completed in the nick of time!


Monday, 4 May 2020

Becoming resourceful

Have I really not written a post since January? Where has the time gone?

I originally started the year with the ambition to find more time to get creative, not least because I had 5 months to create the wedding day of all wedding days. Well, something like that anyway. I also wanted to spend more time at home. Yes, you can laugh at me now but it seemed like quite a challenge back in January!

I was making fairly good progress on wedding preparations but slightly hesitant at sharing things here that I really wanted to hold back for the big day. But then the coronavirus took hold and the landscape has changed.

Firstly, the wedding has been put back by about 6 months in the hope that social gatherings will be both permissible and safe by then. Secondly, I'm fortunate enough to have a job that can, it turns out, as easily be done at home as in the office, so the daily grind for 5 days a week has continued but without the daily commute, saving me around 8-10 hours a week. So, although I am busy for the best part of 5 days a week, I have not only got my wish of spending more time at home but also have an extra 6 months to complete everything that I had planned.

With the pressure off and the sun out, I have very much been tempted out into the garden. And with a new potting shed and a packets of flower seeds purchased last autumn, my evening and weekend obsession has been created.

Things started out deceptively modestly...


... but I'm clearly more green-fingered than I thought as after about 4 weeks the seed trays were looking a little crowded and so I decided to do a spot of potting-on.

But became a little overwhelmed by the result...


... particularly when I began wondering where the next stage of potting-on would go since we don't actually have any flower beds and, because it's a rented house, we can't really dig any in.

But this is were things got fun, and we became resourceful!

I have raided the garage for anything that could possibly be turned into a flower tub (more of which in a later post). We also found three pallets around the side of the house. You know the sort used for large deliveries...


Inspired by a friend, a little dismantling and putting back together occurred ...


... and what is being called a living wall planter was created.


Well, two in fact but we only had enough paint for one of them. Hopefully more paint can be sourced before too many plants get big enough to need permanent outdoor homes. But for now I'm really enjoying the satisfaction of something being made from seemingly nothing or at least things we found lying around. 

Many of us hope that life won't go back to exactly the way it was before the pandemic as we've begin to appreciate the slower pace of life. I know I'm definitely not going to be automatically reaching out for the new before I've exhausted all possibilities of what I can find lying around!

I hope you are staying safe and well and finding as much enjoyment in the small things as I am.


Thursday, 2 January 2020

2019 round-up

2019 was a year of change for me. I think the only constant thing has been the contents of my wardrobe. Even the wardrobe changed. Twice! The year has been wonderful and exhausting in equal measure.

I have certainly had less time to get creative and when I have been creative I have rarely also found the time to write a blog about it, hence the rather low number of blog posts. However, as I browse through my photos from the year I thought it would be a good opportunity to do a round-up of the things that didn't quite make it first time around.

I'll start with the jewellery board I made for my soon-to-be-step-daughter for her birthday in July. She had been admiring mine so it seemed only fair to make her one of her own, including some very special buttons from one of her Dad's old uniforms.


Next up was to treat the spare room bedside lamp to a new lampshade. I say 'new' but I have to say I don't think I ever saw it with an old one! The fabric was a gift from some friends of friends and I'd been desperate to turn it into something for years.


In September we decided to do a big furniture switch between houses. The goal was to give me a space to work and create in. This meant swapping a double bed for a futon and a desk. The bed had been swathed in fabric and I soon found out why. A certain small girl had covered it in pony, football and knight stickers many years ago!


Liberal use of 'Sticky Stuff Remover', a quick sand, the application of some black satin gloss paint found in the loft and it was a bed transformed!


I also finally decided to take the guess-work out of trying to find hats, gloves and all things required for a dog walk, with the natty use of some hand-crafted felt labels.


And before we knew it, Christmas was upon us. This year's Christmas tree decorations were sewn and dispatched...


... and I even found time to make a cake and decorate it before the family arrived for the festive season.


And I couldn't possibly not make a wreath for the door.


Whilst a new pom-pom was made for someone's Christmas jumper, just in time for the village outdoor carol concert.


Finally, but most definitely not least, I'd like to share with you my two favourite hand-made Christmas presents. Firstly, the fabulous Secret Santa gift I received of these make-your-own soup pots. Not only do they look gorgeous but they are a doddle to cook and taste great. One was made for the family over Christmas and the second has just been cooked up ready for some healthy packed lunches.


Secondly, my wonderful new potting shed. I have a pile of seed and bulb packets just waiting to get planted so I had better get my wellies on!


May 2020 be a healthy, happy and creative one for you!

Friday, 11 October 2019

Anti-spider 'buttons'

Having spent my life up until January living in a city I have been extremely surprised by the number of spiders that exist in the countryside - or is it just a particularly 'good' year for spiders. Fortunately, they don't scare me but their cobwebs are driving me mad. The bedroom windowsill had got to the stage where it looked like part of a Halloween display where someone had gone a bit overboard with a can of fake web spray.

After spending last Sunday morning vacuuming up webs and dead spiders we decided to blow the actual cobwebs away by going on a walk with the dog. It wasn't long before our foraging obsession kicked in and we were filling every pocket we had with the goodies we encountered. The result was fairly impressive, if a little random!


The berries are sloes which have been washed and put in the freezer before being made into Sloe Gin, the sweetcorn was enjoyed for dinner and the golf ball is for my Dad. As for the conkers, I've heard from several sources that they are good at repelling spiders (and read several more that there is no scientific proof for this). After my morning of cleaning I was keen to attempt a 'prevention is better than cure' approach and I was willing to try anything.

What I hadn't heard previously is that you are supposed to drill a hole in the conkers. I suppose this helps release something odorous to spiders - or not, depending on who you believe. Although S had offered to drill the holes, the conkers were still quite soft, so I decided it couldn't be too difficult to poke a hole in each one. I cast around the kitchen looking for something suitable but nervous that a slip of a conker could result in the hole being drilled in my hand.

In the end I remembered the little devices we have for holding and eating sweetcorn. These have two extremely sharp prongs, making them just perfect as I felt that the twin prong would also make it less likely to slip and cause collateral damage.

In no time at all I had pierced all the conkers with perfect little twin holes, making them look a bit like buttons and - in my opinion - quite charming.


Now I just have to spread them around the house and see if they have any effect. Apparently, Great Auntie Jean used to swear by them so who am I to argue?


Thursday, 12 September 2019

We're jammin'

I have an ear-worm. You know, a song that you just can't get out of your head. It's Bob Marley's Jammin' and it's all thanks to last week's foraging sessionI guess not many people would associate picking fruit in English hedgerows with a classic Reggae track but, to be fair, the music didn't permeate my brain until quite a few days later.

After the apple and damson 'tip offs' we set out with great enthusiasm armed with far too many tubs and pots in search of our hedgerow goodies.


At least, I thought I was probably being over-optimistic about the amount of fruit we'd find but the last thing I wanted was to be out and about and run out of containers. But as luck would have it, we hit gold! Or should that be purple, red and green?


If truth be told, I had to call a halt to the picking, particularly when it came to the apples. Outside in the big open countryside the containers looked fairly small, but in the confines of the kitchen, the prospect of having to do something with all that fruit suddenly hit me. It was quite a daunting prospect.

However, I was undeterred, and last Sunday morning rolled up my sleeves, gathered every single empty jam jar I could lay my hands on, plus a few that were swiftly emptied thanks to a rather random breakfast, and set to work.


Eight hours later I had 24 jars of apple chutney in three different variations: classic apple chutney, tamarind and apple chutney, and spiced apple chutney. The jars are all now squirrelled away busy maturing, ready for Christmas.

We also had 1.8kgs of blackberries macerating in 1.5kgs of jam sugar and 2.2kgs of stoned damsons. (Top tip: use a cherry stoner to get the stones out of damsons - it still took the best part of 3 hours but it was better than cutting them out with a knife, sieving them out of the finished jam, or - horror of horrors - making jam with stones in which you have to pick out of every mouthful!)

So, where does Bob Marley fit in? Well, that would have been after work on Monday when we made blackberry jam and some plum and apple jam, on Tuesday when we made some damson jam, and on Wednesday evening when we had to reboil the blackberry jam because it hadn't set. After a 2 hour commute and 8 hours in the office each day, things tended to get a bit silly as we heated, boiled and 'wrinkle tested' until I could barely keep my eyes open. At some point, Bob Marley popped into my head, shortly afterwards to be blared out of the iPod, to add to the general silliness!

So, we now have 30 pots of jam to go with the 24 jars of chutney. And it probably wouldn't surprise you to know that, at some point on Monday, a plum tree was found across the road and there is still a large bowl of beautiful plums awaiting further attention! Well, we seem to have mastered the setting point of jam so it would be a bit rude not to continue our jammin'.

Friday, 6 September 2019

Country pursuits

Having exchanged my very urban lifestyle to one much more rural, I have spent the last couple of weekends engaged in very country pursuits. And by that I mean foraging.

I have to say I've never seen so many beautifully fat and ripe blackberries in my life as there are within a stones throw of the house (and I'm not skilled at throwing stones a very great distance!) So far we have picked around 3 kilos and there are still many more for the picking.

To say that there are a few jars of blackberry gin on the go would be an understatement. We are even experimenting with blackberry and vanilla vodka.


And when we ran out of gin jars and room in the freezer, I progressed onto jam.


A huge crop of sloes has been spied but they are not quite ready yet, however the elderberries were at their best last weekend. I had no idea what to make with them but just couldn't leave them on the tree. In the end, the simplest thing to turn them into seemed to be cordial - great diluted with sparkling or still water or even, dare I say, sparkling wine!


We're now just off to pick apples as we've had a call from a friend who has more than he knows what to do with. Another friend has also alerted us to the location of a crop of damsons. To say I'm excited at the prospect of wondering down a green lane on a sunny, late summer afternoon, armed with some empty plastic containers would be a complete understatement. Sometimes it's the simplest of things that can make us happy!

Saturday, 31 August 2019

Bringing joy, simply

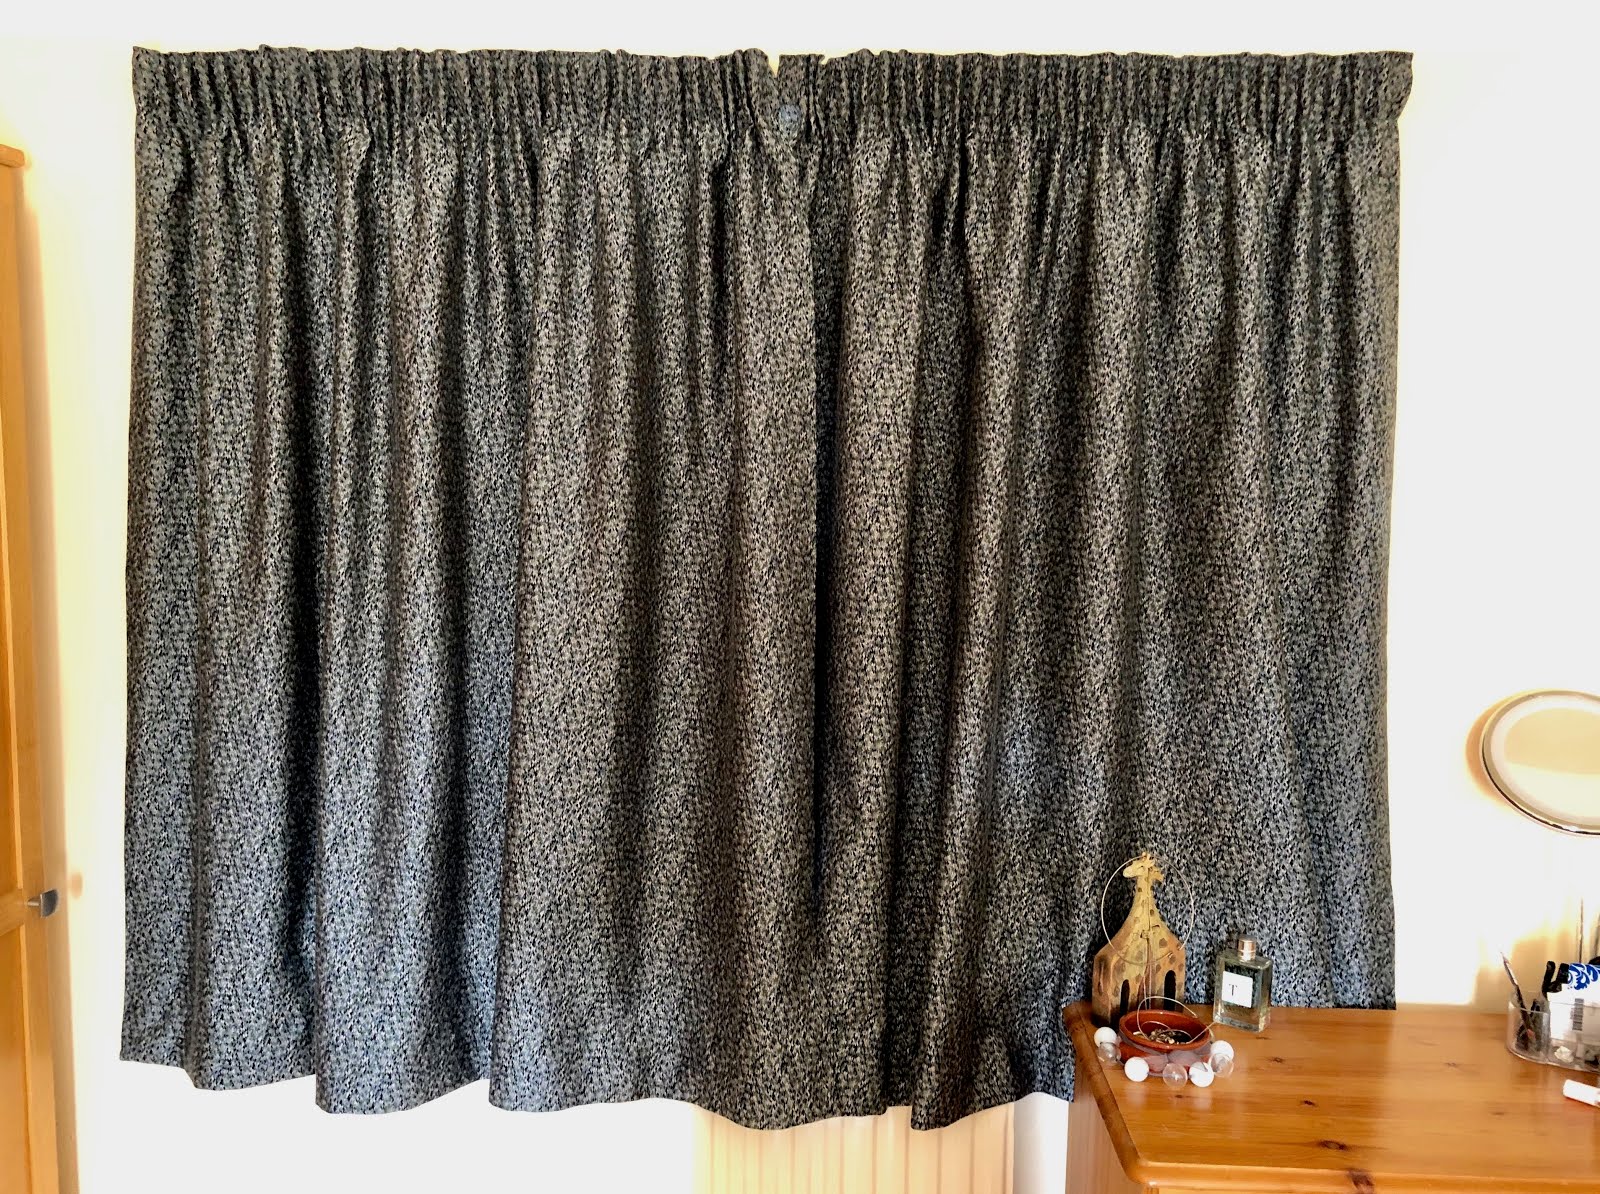
Back in April I was busy making new bedroom curtains complete with black-out linings so that I could sleep even when the sun was rising. Admittedly, this does make finding your way to the bathroom in the middle of the night rather tricky but the sleep is golden!

What I failed to mention was the choice of the fabric. I had originally fallen in love with a beautiful biscuit-coloured linen, embroidered with birds. However, at £70 per metre and a whopping 6 metres needed, this was way beyond the budget, not least because we are only likely to be living in the house for another 2 years.

Not that I'd given up entirely on the bird fabric as the curtain fabric we chose picked out exactly the shades of blue and green that was featured in the embroidered birds. My mission was then to find a metre of the fabric being sold off at a discounted price. After a few weeks of searching, the internet came up trumps and a metre's worth of embroidered birds was being delivered through the letterbox.

The idea was to make some lampshades. One for the ceiling light and the other for the bedside light. The ceiling light was an awkward size. Or should I say that the size and spacing of the embroidered birds proved challenging. However, I just about managed to get the birds lined up. I'm not entirely happy with the final result, but I am particularly picky!


The bedside lampshade was much easier, even if it did mean sacrificing a lot of the remaining fabric to get the birds lined up so beautifully. (Can you tell I'm happier with this one? And who doesn't love a Kingfisher?)


With fabric left over I just couldn't resist having a few more birds perched around the bedroom. A trip to the local craft store resulted in three tapestry hoops of just the right diameter to be able to frame up one of each of the birds to hang on the wall.

This is such a simple thing to do and, I think, looks particularly effective when the bird designs are so obviously embroidered.

I placed the hoop over each bird and centred them up. I then cut out the fabric leaving enough of a border to be able to fold the fabric around the underside of the inner hoop.


I then took a roll of narrow double-sided sticky tape - as luck would have it, the one that came with the lampshade kit was exactly the same width as the inner tapestry hoop - and applied it to the inner edge of the ring.


I then carefully folded over the fabric and stuck it down.


In just a few minutes I had a fabric picture, ready to hang on the wall.


They have been on the wall at the foot of the bed for at least a month now and I don't think I'll ever tire of looking at them. Or is it just that I'm sometimes just too lazy to get out of bed and admiring my handiwork is just a feeble excuse?!

Well, either way, they bring me much joy, so what's not to love?


Sunday, 12 May 2019

Making scents

Work in the garden has continued although, sadly, without me for the past week after I managed to aggravate an old shoulder injury. However frustrating this was, I had no option but to turn my attention to less physically demanding pursuits.

On my wish-list for some time has been to create my own reed diffuser room scents. A nice-smelling room is lovely but I often wonder what you are breathing in when you buy a bottle from a shop. I know there is a list of ingredients on the packet but most of what is listed is completely incomprehensible, to me at least.

Anyway, I did some research on what the most basic ingredients to go in a reed diffuser could be and decided to have a go at making some myself. All you need is a light-weight base oil, preferably unscented or at least pleasantly scented, some essential oils for the scent and some 90% alcohol to help the two mix.

I decided to use almond oil for the base. It's light (so should travel up the reeds easily) relatively unscented, and was half price in my local health food store. I also stocked up on essential oils in the same shop as they were also half price - an important consideration when you consider that you need quite a bit of scent for each diffuser.

As for the alcohol, some sources suggested using 'rubbing alcohol' but anything that resembled such a thing smelled very strongly medicinal and that wasn't quite the aroma I was after for the house - 'eau de locker room' anyone?! Other sources suggested using vodka but I'm yet to find 90% proof vodka that is affordable and won't make the house smell like a distillery - also not the scent I'm after. In the end I found a source of perfumer's alcohol which is 95% alcohol and completely unscented.

The next bit was exceptionally easy as I just mixed 230ml of almond oil with 20ml essential oil (I used 10ml grapefruit oil, about 7ml orange oil, and about 3ml of bergamot oil) and 2 tablespoons of the alcohol. After mixing well I poured it into two narrow-necked glass bottles (saved from shop bought reed diffusers) and popped in some fresh reeds.

The grapefruit oil was a very dark orange so that has made the mixture a strong golden yellow but that's in keeping with the colour scheme of the room that they are in so not an issue.


I'm rather chuffed with the results although yet to work out quite how effective they are going to be. They are in the kitchen and I went on to make three batches of curry paste and the kitchen definitely smelled more like the ingredients for curry than 'uplifting citrus'!

Sunday, 21 April 2019

Wild Creations

The last week has seen a wild theme to my creative projects. The first was a result of a mammoth gardening session last Sunday when we tackled a very large cherry tree in the garden which, by the look of it, hadn't been pruned in at least ten, perhaps twenty years. It had a number of large, crossing branches which were rubbing against each other leaving wounds which could easily let infection in. These we removed, along with other low hanging branches. The result was a more healthy looking tree and an enormous space in the corner of the garden. The latter, we quickly realised, was the part of the garden that gets the afternoon and evening sun - perfect for the table and chairs. However, before we could enjoy our new sunny spot, we had rather a lot of tree to dispose of.

The smaller branches went into the garden waste bin and the two largest branches have been saved for a couple of future creative projects (watch this space!). Everything that was too large to be chopped up with secateurs was chopped into 30-40cm lengths and stacked in a gap in the hedge. A simple task that has left me very happy since I now have a wildlife wood pile.


A few days after its creation we spotted the first hedgehog in the garden so I'm hopeful there will be a lot of wildlife that will soon make the most of this new habitat.

Meanwhile, wild garlic is in season and I've been lucky enough to have received deliveries of it in my veg box for the past couple of weeks. My favourite two recipes are very simple. The first is to ferment it as you perhaps would to turn cabbage into sauerkraut. I chopped 100g of wild garlic and 'massaged' in 1g of sea salt (table salt should be avoided as it contains iodine and will kill of any of the good bacteria you need to ferment the leaves). This began the process of drawing water out of the leaves but not to a large extent. I therefore transferred the chopped leaves and salt into a jar and then topped up with bottled spring water (tap water contains chlorine which also kills off the good bacteria and so this too should be avoided). After a week, the smell of garlic had begun to mellow as the leaves gradually fermented. I use a spoonful here and there to add a kick of flavour towards the end of cooking or mixing into mashed potatoes. This will keep for weeks, if not months.


The second recipe is for wild garlic pesto. For this place 100g wild garlic, 50g grated Parmesan or similar salty, hard cheese and 50g pecans, hazelnuts or other nuts of your choice. Blitz in a food processor and then add lemon juice, salt and pepper to taste and enough olive oil until you have your desired consistency.


This makes a fairly large quantity, especially since it is potent stuff! I therefore opted to freeze it in small quantities. I normally use an ice cube tray for this sort of thing (grated ginger, curry paste etc.) but we still haven't managed to locate them following the house move. However, I did find a stack of disposable shot glasses.


Once frozen the blocks of pesto are popped out of the glasses and into a zip-lock bag to be dipped into whenever desired. Both recipes are a great way to extend the rather short period of time when wild garlic can be used in the kitchen. All in all, a few little jobs that will bring pleasure for months to come (hopefully longer for the log pile!)


Sunday, 14 April 2019

Achieving darkness

It has been a frenzy of activity at Chez ElleAyJay since the unplanned house move in February. I'm pleased to report that all the rooms now have lined curtains, meaning that sleep past dawn is now possible. Clearly this wasn't a problem in February and March, or at least not during the week when the alarm clock goes off way before sunrise. However, since we moved to British Summer Time at the end of March, the alarm call and sun rise have been having a bit of a race.

All the rooms except for one had re-purposed curtains, which was a huge cost saving even if it did mean altering some hems. However, the last room to get sorted was the main bedroom and the combination of how light sensitive I am and the fact that the inherited curtains were of the palest colour and totally unlined, was becoming a challenge. I think a couple of sheets of tissue paper would have blocked as much light as the curtains and so this became a bit of a mission for me.

A dark fabric was chosen and ordered along with some blackout lining, which is very densely woven and highly effective. With five to six metres of each fabric, the first challenge was to clear enough floor space to measure out each curtain. This achieved, I spent much of last weekend crawling around the floor cutting, pinning, sewing and ironing. The final steps took place yesterday whilst I sat and hand sewed the hems whilst catching up on the week's radio dramas - one of the joys of the home made is the moments of calm like this, followed by the sense of achievement when all is done.


In this case the sense of achievement was doubled when the bedroom remained dark in spite of the beautiful sunshine this morning... sleep undisturbed until the allotted time!

The next task is to make some lampshades but not before we've taken advantage of the beautiful weather today to make a start on taming the garden. The house was empty for eight months before we moved in so we have our work cut out for us. Wish us luck!

Friday, 1 March 2019

Golden Snitch lampshades


2019 is proving to be a busy and momentous year. Not only did I start a new job in January but I also moved house. Rather unexpectedly, I then moved house again last week. Let’s just say, the year’s events have definitely been keeping me on my toes!
Sadly, this has meant little time to exercise the creative muscles. I’ve even been cooking less. However, I’m hoping things are going to settle down a bit and that I can get creative again.

Mind you, this is not to say that I’ve done nothing. I have a friend who also moved house in January and I was determined to put an idea into practice as housewarming presents for her two young sons. Late last year a friend, who is a primary school teacher, was telling me about a lantern parade she was involved in at school and she was getting all the children in her class to make bird themed lanterns. She then also showed me a very basic paper lampshade that she had decorated for her apartment. Both these projects planted a seed in my head which I have been waiting for an opportunity to try out ever since.

My friend’s sons happen to be Harry Potter fans and so the idea of turning a paper lampshade into a Golden Snitch was born. For those not familiar with the Harry Potter stories, a Golden Snitch is a small flying ball that features in the popular game of Quidditch.  The Golden Snitch is released from a box at the start of the game and it is the role of each team’s Seeker to catch it whilst dodging various obstacles which his or her team mates try to protect them from.

In reality – umm… I mean, in the fictitious world of Harry Potter (!) – a Golden Snitch fits into the palm of your hand but a lampshade this size would be no good to anyone. My Golden Snitches were, therefore somewhat larger. They also involved a considerable amount of planning and engineering, with materials being an important factor in how the lampshades were eventually constructed. To be completely honest, they just gradually evolved!


The main body of the Snitch was always going to be a paper lampshade sprayed gold but the wings went through various thought processes and experiments. Card wings seemed difficult to attach to what is a very flimsy and fragile lampshade so that plan was quickly dismissed, and the plan for pipe cleaners and tissue paper turned out to be just too flimsy. In the end I happened across a wipe clean but disposable table cloth in the partyware section of my local supermarket (I have completely forgotten what I was actually looking for at the time). This proved to be far more robust than the gold tissue paper I had but still had the advantage of allowing movement.

With the pipe cleaners being dismissed as too flimsy, the offer of the core wire from a disused coaxial electrical cable was gratefully accepted. Two lengths were cut for each lampshade paying careful attention to get the right proportion of wing size to body (how did we achieve anything before the arrival of Google Images?) and these were further lengthened with a section of pipe cleaner at each end. The object of the pipe cleaner was to give a little more fluidity to each wing tip and also attempt to reduce its ability to poke out an eye!

A wing shape was cut from the folded tablecloth, with the fold planned for the top edge of the wing.  The wing shape was then opened out and the length of wire and pipe cleaner placed along the inside of the fold with about 10cm of wire sticking out as a sort of feather ‘quill’ to attach to the lampshade and the pipe cleaner making up approximately 10cm at the other end - the feather tip.

The wire was then taped in place using double sided tape. The protective strip was then removed from the second side of the tape and the wing folded around the wire to reveal its final shape. All was left to do was to create the wings’ feathers by snipping along the bottom edge.

How to attach the wings had been exercising me a bit but it was the lampshade structure that gave the solution, courtesy of my residential engineer! Each lampshade comes flat packed with a rectangle of wire to insert to help open it out. Fortunately the top edge of the rectangle of wire has three really handy features. The first is a c-shaped piece of wire in the centre which is where you hang the lampshade on the lighting flex that hangs from the ceiling. The other two features are a small triangle of wire sticking up at the top corners of the rectangle for inserting into two small circles of wire in the top of the lampshade which help anchor the lampshade to the rectangular frame.

The wings were easy to attach by threading each bare ‘quill’ wire through the small triangle on either end of the frame and then hooking the end around the c-shaped piece of wire in the centre. This gave them enough of a foundation to stick out rather than droop down.  There was also no trying to attach wire to the fragile tissue paper lampshade. The ability to slot the wings in and out also meant that the Golden Snitches were much easier to transport – believe me, two large and fragile lampshades are a lot easier to fit in the back of a car if they don’t each have two huge wings sticking out of them!

A completed Golden Snitch
I was rather pleased with the end results and just hope that the Harry Potter fans were equally as delighted.

A Snitch in its new home