My very good friend has two little boys and, as each arrived, I made them bunting that spelled out their name. In each case, the end product was very well received and so I decided that 'Mum' should get to have her name in bunting too. So, with her birthday rapidly approaching I finally sat down to the project, managing to sew each letter between spraying coats of paint on the bathroom towel rail.
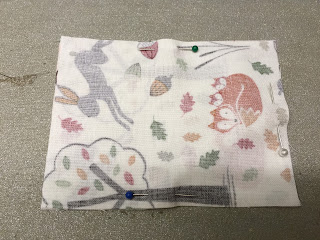
I have no idea what the individual elements on a string of bunting are officially called but here I'm going to call them 'flags'. In this version, each flag is made from two pieces of fabric, each measuring 12cm by 9cm. You will need a pair of fabric rectangles for each letter, preferably a plain fabric; and a pair for each end, preferably a patterned fabric.
For the letters I used the computer, dividing an A4 sheet into quarters and typed out my friend's name with one letter in each quarter of the page, adjusting the size of the letters until it looked about right. Once printed out I traced the letters back-to-front onto some bondaweb and then cut each letter out roughly.
These were then ironed onto felt before being cut out following the traced lines of each letter.
I carefully peeled the paper backing from each bondawebed letter and lined each letter onto a piece of the cut plain fabric flags. Each letter was set slightly lower than centre since I knew I was going to lose a bit of the top when I sewed it onto the ribbon.
The next bit is rather a of a labour of love and what occupied me between coats of radiator paint. If you've seen a previous post featuring an appliquéd blanket, you may know I have a bit of a soft spot for blanket stitch. Bondaweb is a great invention but the heat-activated glue can fail over time so adding something more permanent is always recommended. In this case I chose to use tiny blanket stitches using embroidery thread. Well, if I'm honest, I did this for my friend's first son and felt I had to continue the theme for fear of causing sibling rivalry! Anyway, depending on the complexity of the letter this took me between 30 and 45 minutes per letter. However, since this blog is all about the hand made as opposed to the mass-produced, as well as the joy of creating something by hand, it's all part of the process and it was really rather relaxing (not to mention better than watching radiator paint dry!).
Once all the letters were stitched securely in place, I turned my attention to making each flag by placing each piece of fabric with a letter on it, face to face with a correspondingly coloured but unadorned piece of fabric. I did the same with each pair of pattered pieces of fabric. Using the sewing machine I then sewed around the sides and bottom of each flag leaving as small a seam as I could - about 0.5cm.
I clipped the bottom corners and then turned each flag the right way out, ensuring the corners were as sharp as possible, before pressing flat.
The final step was to sew the flags (in the right order!) onto some bias binding. I first pressed the bias binding in half lengthways and then spaced the flags out before pinning them in place.
A line of stitching the full length of the bias binding was all that was left to do before I could admire my day's work.
Now all I have to do is apply the final coat of paint to the radiator!


No comments:
Post a Comment