Tuesday, 22 December 2015

A Speedy Gift Box

Just picture the scene. You've planned to give some edible treats as a present. You carefully chose the recipe, made sure you had all the ingredients, and cooked and baked with great care and attention so that the results were gift-worthy. Brilliant!

But have you thought how you are going to package and present them? You have some cellophane bags in the drawer but your baked delights are perhaps too fragile or sticky or will fall out of the lovely paper cases that you delicately placed each morsel in. Fear not! If you have a sheet or two of A4 paper all is not lost. You can fold it into a box.

My colleague showed me this a couple of months ago, much to my disbelief. He's an artist and apparently it's common for printers or painters to make such boxes for their ink or paint. The great thing about this is that you can just screw it up once you are done, keeping all the mess inside. Apparently they've been using these boxes (and no doubt screwing them up) for centuries.

However, no screwing up is taking place here, not least because I've found a great video on YouTube that will show you exactly how to do it.


I took a second sheet of paper, trimmed 1cm from one of the long edges and another 1cm from one of the short edges and then followed the same instructions. This slightly smaller box works really well as a base, with the original size box fitting as a lid.

Secure with a ribbon (or adorn as you see fit) and you have a instant gift box. Well, as instant as I think you are going to get without calling on the services of your fairy godmother and her magic wand!


Sunday, 20 December 2015

Mission: Christmas

I'm lucky enough to have finished work now until 2016 and so Mission: Christmas well and truly began this weekend.

Alongside a trip to Ikea to buy more dining chairs, the weekend has involved furniture being rearranged to make room for more beds, a final check of the festive recipes to ensure the ingredients are either already in the house or on the shopping list, ensuring that all guests eat at least most things on the menu, the purchase of a Christmas tree, the putting up of Christmas decorations, and the bathroom being reassembled - the toilet and sink have been sitting in the bath for the past two months as new flooring has been laid, a new bath panel constructed, and the whole room painted.

Amongst all this activity I decided that I may need a few mince pies to hand to keep me going and to offer anyone dropping in to say hello or to exchange presents. Since these would have to be gluten-free for me to enjoy and gluten-free pastry is one of the most fragile materials on the planet (or so it seems), I felt that a traditional mince pie recipe may not be the best bet.

You may have noticed last week that I made Chocolate Brownie Mince Pies for my colleagues. These work well since the brownie and mincemeat mixture seems to hold the pastry base together pretty well. I was therefore on the lookout for something similar and found a gluten-free Frangipane Mince Pie recipe. Essentially, this is like a mini Bakewell Tart with mincemeat in place of the jam.

They are looking good so far, perhaps with the addition of a dusting of icing sugar once they are cool?


So, with the mince pies cooling I decided to finish making the Limoncello, which involved diluting and bottling it. A satisfying and pleasant job as the smell of lemons met my nose.

Yes, bottom left, that's a sneaky tot for the chef!

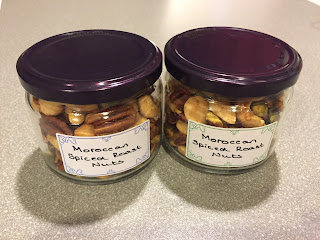
And, if I'm to get the presents wrapped this evening, I'd also need the accompanying Moroccan Spiced Roast Nuts, which needed to be - er, spiced and roasted!


So, the Christmas preparations are well and truly underway and, happily, that's a few things crossed off the list. My two big questions now are, will I get the rest done before The Clan arrive on Wednesday, and what on earth am I going to have for dinner tonight? Other than a Frangipane Mince Pie!


Sunday, 13 December 2015

The Traditions Begin

This weekend it feels as if the Christmas traditions are beginning to take hold, although I'm now wondering how long something has to have been going on for it to gain 'tradition' status. If about 8 years counts, I'm on safe ground to continue.

I can't remember exactly when craft club started but I have a feeling that it must have been about 2007, and at each December gathering at least one of us ends up making a Christmas wreath. This year I obliged, inspired by an idea described to me by my mother after she enthusiastically returned from an inspiring day of creative demonstrations hosted by her local WI branch.

I successfully found and dusted off my metal wreath frame, bought a large ball of green garden twine, selected a few gold baubles from my collection and grabbed the red ribbon - I was ready to begin. Tying the end of the twine to the frame I began to carefully wind it around and around until I had an even shape, which ended up using all of the twine. I had imagined that this would be a fairly swift process but it actually took much longer than I had anticipated. Perhaps the mulled wine, nibbles and general chit chat had something to do with that? Oh, as well as protecting my ball of twine from becoming a new toy for the cat!

That done, I selected 4 golden baubles and suspended them using different lengths of thin red ribbon in the centre of the circle before adding a wide red ribbon from which to hang it on the front door. I did play around with several versions of ribbon bows but ended up deciding that the minimalist look worked best. Simple and, hopefully, robust enough to withstand the wind and rain we have been experiencing recently.


And so, the first Christmas decoration is now up at ElleAyJay Towers!

The next task was to create something festive and edible for the office. I'm not really one for Christmas cards, particularly for colleagues as you invariably end up inadvertently missing someone out. Instead, I try to make something edible to leave by the tea station for everyone to tuck into.

Last year I had to cater for a vegan so opted for Pruffles, also known as Prune and Chocolate Truffles. These went down very well but a couple of colleagues looked a bit disappointed when they appeared since a few weeks earlier I'd been talking about a recipe I have for Brownie Mince Pies. I vowed to make them this year so that's what I've been doing this afternoon.

Quite simply, you make a batch of pastry and line 24 muffin tins as if you were making mince pies. You then make up a batch of chocolate brownie mix (use your favourite recipe) and add in about 200g of mincemeat. Fill each pastry case with the mincemeat-flavoured brownie mix and bake for 20-25 minutes, gas mark 4/160C. Leave in the tins for about 5 minutes before popping each brownie mince pie out onto a wire rack to finish cooling.


If you are so inclined, you can top each one with a blob of whipped cream and a sugar-coated cranberry. However, this batch needs to be transported to work in a cycle pannier so I'll be giving that bit a miss. As it is I'm a bit worried that they may not survive the journey and am beginning to think that truffles may have been a better idea after all!

Sunday, 6 December 2015

Christmas Preparations

I'm having a bit of a clear-out in preparation for hosting a houseful this Christmas. As a result the weekend has been rather dominated by sorting, reassembling and cleaning old furniture ready for collection by the local hospice. It has felt rather cathartic but I can't tell you how many trips to the loft were required to find missing bits or the right screwdriver or alun key. The result is a kitchen jam-packed with chairs and I can't get into the sewing room for tables. I just hope they agree to take it all as I've not really come up with a Plan B. It is certainly not all going back into the loft or spare room!

However, I'm pleased to say that other more creative Christmas projects have also been squeezed into the weekend. The first project was triggered by the fact that I had managed to source suitable Christmas cracker gifts for everyone and I was itching to get them assembled. This was a fairly swift task thanks to the discovery of Christmas cracker kits a few years ago. In fact, a year following an attempt to make some from scratch, which was very fiddly with less than aesthetically pleasing results.

I feel the best bit about home made crackers is the option of putting a higher quality and recipient-appropriate gift inside. Therefore, I swallowed my hand made, purist pride the second I spotted that first cracker kit and haven't looked back since. This year's kits are courtesy of Oxfam so I can also feel that a tiny contribution to charity has also been made (although I'm sure it was very tiny since the kits only cost £3 for 6 crackers).

I'm obviously not going to reveal the contents of the crackers here - some element of surprise must be able to remain even if I do know what's in mine! However, the result of my efforts was a pleasing festive pile of cardboard tubes complete with gunpowder, hats, jokes and (hopefully appreciated) mystery gifts.


Surveying my list of Christmas projects I quickly realised that the Limoncello needed 10-15 days to 'mature' and so I'd better get on with it. However, first I needed to free up the container in which I was going to make it and this meant doing something with the contents - Spiced Cranberry Vodka.

This was made in September and had been quietly doing its stuff, with a helpful shake of the jar every week since. This is a complete experiment as I'd lost the original recipe (typically now found!). It was time to strain and bottle the resulting dark amber liquid but not before a quick taste, revealing that it's pretty potent in a warming and spicy way. I'm sure it will slip down nicely if it ever decides to get cold this winter. Alternatively, I quite fancy trying a little tot in a champagne flute, topped up with Cava or Prosecco.


With the jar washed-up I could finally turn my attention to making the Limoncello. This was a recipe left on my desk by a colleague back in the spring. She knows I like to make things but I think this particular recipe was inspired by our office Christmas lunch last year. Our party was (un)lucky enough to be eligible for free Limoncello shots for the whole table. I thought it was a great way to finish the meal, being quite partial to an occasional nip of this lemon liqueur, but what arrived looked and smelled just like lemon floor cleaner. I can't possibly comment on the taste comparison since I've never tried floor cleaner and soon wished I'd not tried the free offering either!

I'm hoping my home made effort will be better.  The restaurant in question has set a pretty low bar so, let's just say I'm quietly confident.

This has to be one of the simplest things I've made: peel the zest off 10 unwaxed lemons (yellow peel only - leave the white pith behind) and pop in a 1.5 litre jar; add 1 litre of vodka and 1kg of white sugar; seal the jar and store in a dark place, shaking daily until the sugar has completely dissolved. After 10-15 days filter through muslin and top up with 1.5 litres of spring water.


If the results are good enough, some of mine will be bottled as gifts, the rest being reserved for the Christmas trifle - a layered bowl full of tangy lemon, cream, yoghurt, blueberries and soft amaretti biscuits. I can't wait!

Saturday, 28 November 2015

Name Bunting

The autumn is always busy at ElleAyJay Towers, not least because I suddenly realise how many birthday and Christmas presents there are to make and how little time I have. This year is no exception, not helped by also trying to give the bathroom a revamp.

My very good friend has two little boys and, as each arrived, I made them bunting that spelled out their name. In each case, the end product was very well received and so I decided that 'Mum' should get to have her name in bunting too. So, with her birthday rapidly approaching I finally sat down to the project, managing to sew each letter between spraying coats of paint on the bathroom towel rail.

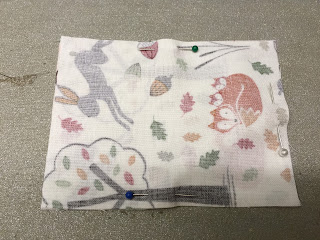
I have no idea what the individual elements on a string of bunting are officially called but here I'm going to call them 'flags'. In this version, each flag is made from two pieces of fabric, each measuring 12cm by 9cm. You will need a pair of fabric rectangles for each letter, preferably a plain fabric; and a pair for each end, preferably a patterned fabric.


For the letters I used the computer, dividing an A4 sheet into quarters and typed out my friend's name with one letter in each quarter of the page, adjusting the size of the letters until it looked about right. Once printed out I traced the letters back-to-front onto some bondaweb and then cut each letter out roughly.


These were then ironed onto felt before being cut out following the traced lines of each letter.


I carefully peeled the paper backing from each bondawebed letter and lined each letter onto a piece of the cut plain fabric flags.  Each letter was set slightly lower than centre since I knew I was going to lose a bit of the top when I sewed it onto the ribbon.


The next bit is rather a of a labour of love and what occupied me between coats of radiator paint. If you've seen a previous post featuring an appliquéd blanket, you may know I have a bit of a soft spot for blanket stitch. Bondaweb is a great invention but the heat-activated glue can fail over time so adding something more permanent is always recommended. In this case I chose to use tiny blanket stitches using embroidery thread. Well, if I'm honest, I did this for my friend's first son and felt I had to continue the theme for fear of causing sibling rivalry! Anyway, depending on the complexity of the letter this took me between 30 and 45 minutes per letter. However, since this blog is all about the hand made as opposed to the mass-produced, as well as the joy of creating something by hand, it's all part of the process and it was really rather relaxing (not to mention better than watching radiator paint dry!).


Once all the letters were stitched securely in place, I turned my attention to making each flag by placing each piece of fabric with a letter on it, face to face with a correspondingly coloured but unadorned piece of fabric. I did the same with each pair of pattered pieces of fabric. Using the sewing machine I then sewed around the sides and bottom of each flag leaving as small a seam as I could - about 0.5cm.


I clipped the bottom corners and then turned each flag the right way out, ensuring the corners were as sharp as possible, before pressing flat.


The final step was to sew the flags (in the right order!) onto some bias binding. I first pressed the bias binding in half lengthways and then spaced the flags out before pinning them in place.


A line of stitching the full length of the bias binding was all that was left to do before I could admire my day's work.


Now all I have to do is apply the final coat of paint to the radiator!

Monday, 23 November 2015

You don't mind when it's something you enjoy

On Saturday morning I went to a craft fair held at my parents' local garden centre. There were about 40 stalls of local producers ranging from ceramics and jewellery through to a producer of beauty products made from lavender grown in the Mendips, a Somerset cider maker, and even a local vineyard showcasing their first commercial wine (a delicious rosé).

One stall holder made the most intricate beaded jewellery. It wasn't quite to my taste but I could fully appreciate the enormous amount of time that she must spend on her craft, the smallest of which must contain hundreds of beads, and I said as much. The lady did agree but added 'but you don't mind when it's something you enjoy, do you'.

She couldn't be more right in my opinion and I instantly thought of the project that I've been working on for the past six weeks - or is it seven?  Or perhaps it's only four but feels like it has been going on forever (I'm not the most patient of people!) The project is making a set of coasters and placemats for my new dining table. The table was purchased in early October and was finally delivered last week. It will seat 8 cosily so I had begun work on a set of eight placemats and coasters as soon as I had ordered the table, having been thinking about them for some time before.

I had originally thought of making the coasters from denim but my fabric searches had failed to unearth anything that was the right colour or wasn't so rigid that I feared for my sewing machine and the quality of the final product. Alongside my fabric searching I seemed to keep running into conversations or magazine articles or things in shops about needle-felting - a craft that I haven't done for some time. I decided the coincidences of these encounters and the lack of suitable denim was trying to tell me something and so I decided the placemats and coasters should all be needle-felted. The end product would be thick enough to offer great heat resistance and the materials required were either already in the house or easy to find from local craft suppliers

A new kitchen is also being planned - black and white with hints of oak - so I thought I could get rather bold with accessories, including the placemats. I therefore hit on a 'rainbow' theme, making each mat a different colour. I had 5 of the 8 colours already in stock so the financial outlay for the additional colours was minimal (about £3 per colour) plus a 30cm diameter tapestry ring to use as a template for the placemats (also only about £3). What I had forgotten was how long needle-felting takes, particularly large items! What I would save in fabric costs would be made up for in woman-hours. However, as the bead jewellery lady so rightly said yesterday, you don't really mind when it's something you enjoy. I'm also getting to catch up on a lot of radio dramas (bliss!)

So, in amongst the 9-5 job, household chores and errands, even attempting to maintain some sort of social life and not become a wool-stabbing recluse, I have spent the past 6 weeks attempting to turn this...
...to this...


If you are unfamiliar with the process of needle-felting it essentially involves stabbing carded wool with small barbed needle (or four together in a holder as pictured). You need a foam pad to work on that the needle can sink into; and, in the case of the placemats and coasters, some sort of circular template such as a tapestry frame (the placemat) or a cookie cutter (the coaster).  The stages look something like this...

Lay tufts of the carded yarn criss-cross within the template

Stab with your needles

Turn and stab some more

Keep going until the surface is dense and neat

I find that I need to peel the felt off the foam pad and turn it over and needle it from the other side about 4 or 5 times, hence it takes so long to make.

I've only managed to make 6 placemats and 5 coasters so far, but with the added arrival of new dining chairs on Saturday, I couldn't resist testing out the overall look.


Spot the missing coaster!
Now I just have to make the final placemats and coasters. The two missing colours are royal blue and purple.

I'm really pleased with the look so far, the mats giving a real pop of colour to the room. However, I fear they are not very festive so I may need to come up with an alternative for the Christmas table. I'd better get my thinking cap on!

Monday, 2 November 2015

Halloween Food Fun

I'm busy making some placemats and coasters but it's turning out to be a lengthy process at a busy time of year. As a result, I'm only about half-way through and am not yet ready to share. However, I took time out from placemat-making this weekend to have some Halloween fun with food.

As a regular reader of the Sainsbury's Magazine I had spotted a tasty-looking themed menu in the October issue so promptly invited some friends over and got cooking.

The menu consisted of baked Camembert with pumpkin dippers and crudités, followed by smoky chipotle chicken one-pot with chunky coriander guacamole, with a spiced treacle and hazelnut tart for dessert.

I had to make a few tweaks in order to cater for everyone but I can't say they had any effect on everyone's enjoyment of the meal.

Firstly I had to make it all gluten-free, which is my excuse for the pumpkin dippers spreading out rather more than expected - still deliciously cheesy and fun, if a little thin and losing their shape!


I then had to substitute the coriander, since it is a pet hate of one of my friends. I chose parsley instead.

As for the treacle tart, as well as being gluten-free it turned out a whole lot more ghostly.  I couldn't lay my hands on the recommended bat cookie cutter for the decorations but think the ghosts look just as fun floating around in the treacle.


OK, so I'm not likely to be picked to take part in the next Great British Bake Off as a result of my efforts (not least because I don't get the impression that the judges do gluten-free very willingly!) However, in my defence, the tart didn't have a soggy bottom and, in spite of some shrinkage at the sides and a little bit of a spillage of the filling, it tasted delicious and my friends were sent home (willingly!) with a doggy bag of treacle tart.

Huge thanks to my friends for being my guinea-pigs and indulging me in my food fun. And, now that it's tried and tested, I'm busy working out what cookie cutters I can use for the same menu on Christmas Eve!

Saturday, 10 October 2015

Autumnal Italian Chestnut Cheesecake

This week I'm staying with friends in their farmhouse innorthern Tuscany so this is most definitely the Italian edition of ElleAyJay.

Shortly after I arrived my attention was drawn to a magazine sitting on the kitchen table. It looked like the sort of magazine that is produced to celebrate a region's cuisine. My knowledge of Italian is non-existent so I was making my judgement based purely on appearances. The production values appeared high with mouth-wateringly beautiful photos of food and a stylish layout.

I was, therefore, somewhat surprised to learn that it was the seasonal magazine produced for loyalty card holders of a supermarket chain, Esselunga. Anyway, it was just packed full of delicious looking autumnal recipes and the cheesecake on the cover had certainly grabbed my attention.


Having found the recipe inside, I enlisted the help of my friends' knowledge of the Italian language alongside a healthy use of the internet to discover it was a Chestnut Cheesecake. Since my friends live on the side of a valley covered in chestnut trees I felt that it would be a bit of a crime not to attempt to make it. Also, if it turned out to taste as good as it looked, taking the recipe home could be one of the best holiday souvenirs ever.

Inspiring chestnut trees (and amazing view)

More testing of my friends' knowledge of the Italian language against my knowledge of making other cheesecakes made me feel fairly confident that I could attempt to make it. It therefore just remained to see if we could find all the necessary ingredients. We naturally headed to the aforementioned local supermarket.

So, here is my version of Autumnal Italian Chestnut Cheesecake.

Take a 20cm diameter spring form or loose bottomed cake tin and line with baking paper.

Melt 100g butter and mix in 180g finely crushed biscuits such as digestives (gluten-free or ordinary) and 75g finely chopped Marrons Glaces. Actually Marrons Glaces were the one ingredient the supermarket couldn't sell us so we improvised. Last year my friends gathered, cooked and painstakingly peeled a pile of chestnuts from their land and made chestnut liqueur. We therefore purloined all the chestnuts for this recipe from their sweet, boozy bath as a delicious substitute. Anyway, press your butter, biscuit and chestnut mixture into the base of the tin. Chill in the fridge whilst you prepare the fillings.

Firstly chop another 75g Marrons Glaces and set to one side. Next, place 10g leaf gelatine in a bowl of cold water and leave to soak for 10 minutes.

The next ingredient required literally translates as 'spoonable cheese' but in England this is cream cheese of the spreadable variety, such as Philadelphia. Take 250g of the cream cheese and beat with 240g 'creama di marroni'. This was sold in the jam section of the supermarket so I can only assume it's chestnut jam (or chestnut spread?) since the ingredients listed are chestnuts, sugar, pectin and vanilla essence.


Assuming you can't get hold of this in the UK, I suggest using the same quantity of sweetened chestnut puree and a heaped tablespoon of vanilla bean paste. Chestnut puree tends to have a pretty solid consistency so this may take quite a bit of mixing. Once fully blended, set the mixture to one side. If you've used chestnut puree you may need to make a judgement call on the consistency of this filling. If it looks too loose to hold its shape you may need to add some gelatin. In this case, soak some more gelatine (say another 5-10g) as described above.  You will eventually split this across the two fillings.

Next, take 250ml cream and gently heat 5 tablespoons of it in a small saucepan but do not let it boil. Remove from the heat. Whisk the rest of the cream with 10g caster sugar until it forms soft peaks.

Gently lift and squeeze the soaked gelatine from the cold water and dissolve in the warmed cream. If you have just used 10g of gelatine, whisk all of it into the cream and sugar mixture and quickly fold in the chestnuts you chopped earlier. If you decided your cream cheese mixture needed thickening and added more gelatine, just add half to the whipped cream mixture at this stage.

Pour the whipped cream and chopped chestnut mixture onto the chilled biscuit base and smooth to form an even layer. You will need to work fairly fast as the gelatine will begin to set as it cools, which it will do as it mixes with the cold whipped cream.

Next, add the remaining gelatine and warm cream mixture (if using) to the cream cheese and chestnut puree mixture and stir very well. Add this final mixture to the tin to form a second layer of filling. Spread this evenly over the cream layer, making the top as smooth as possible. Chill the cheesecake for at least 6 hours.


To serve, remove from the tin to a serving plate and decorate with 10 whole Marrons Glaces, one per slice.


I can confidently report that the finished product lived up to expectations and it may well be making an appearance around the festive table this Christmas!

Saturday, 26 September 2015

Roast Tomato Sauce

This week saw the first day of autumn, or the autumn equinox, and the traditional season for a 'harvest festival'. I therefore shouldn't be surprised that in recent weeks my focus has been on cooking up what nature (with a little help from me in some cases) has produced.

This week is no exception. I have heard that this year in the UK has been a poor year for tomatoes but a great year for figs. I beg to differ. My fig tree has produced only around 6 ripened fruit so far but my tomatoes have been brilliant. Hardly a split fruit and I'm confident that a record percentage will ripen, meaning I probably won't be making any green tomato chutney this year - a definite first.

However, this did mean that I found myself picking 2kg of ripe tomatoes in one go - probably another record. I decided to roast them to make a sauce.


I set the oven to heat up to 190C, gas mark 5, and dug out two large baking trays, which I lined with a sliced onion and 5 cloves of garlic, also sliced. I then set out to halve my 2kg tomatoes and place these on the onion and garlic, cut side up. The whole lot was sprinkled with thyme leaves, salt, pepper, a teaspoon of soft brown sugar, 2 teaspoons of balsamic vinegar, and 4 tablespoons of groundnut oil.


I placed them in the oven for 70 minutes, switching the trays around half-way through the cooking time.


After allowing the trays to cool slightly I tipped everything into a food processor and gave it a blitz before pressing the puree through a sieve to remove the seeds and tomato skins.


If you prefer a chunky sauce you will need to skin the tomatoes before roasting them and then just give them a brief turn in the food processor after roasting. However, my tomatoes are a small, cherry variety and the thought of skinning them all at the start was too much to contemplate. You do lose some volume of sauce when sieving it though. I ended up with 750ml of sauce, enough to serve 6 as a pasta sauce. I imagine that a skinned and un-sieved version would give you almost a litre.

All in all, a pretty easy way to deal with a glut of tomatoes, as well as store some of the taste of summer for a cold winter day, since the sauce freezes well. I placed two 250ml batches in the freezer and kept another 250ml portion in the fridge for a speedy work-day pasta supper.

Delicious!