Sunday, 12 May 2019

Making scents

Work in the garden has continued although, sadly, without me for the past week after I managed to aggravate an old shoulder injury. However frustrating this was, I had no option but to turn my attention to less physically demanding pursuits.

On my wish-list for some time has been to create my own reed diffuser room scents. A nice-smelling room is lovely but I often wonder what you are breathing in when you buy a bottle from a shop. I know there is a list of ingredients on the packet but most of what is listed is completely incomprehensible, to me at least.

Anyway, I did some research on what the most basic ingredients to go in a reed diffuser could be and decided to have a go at making some myself. All you need is a light-weight base oil, preferably unscented or at least pleasantly scented, some essential oils for the scent and some 90% alcohol to help the two mix.

I decided to use almond oil for the base. It's light (so should travel up the reeds easily) relatively unscented, and was half price in my local health food store. I also stocked up on essential oils in the same shop as they were also half price - an important consideration when you consider that you need quite a bit of scent for each diffuser.

As for the alcohol, some sources suggested using 'rubbing alcohol' but anything that resembled such a thing smelled very strongly medicinal and that wasn't quite the aroma I was after for the house - 'eau de locker room' anyone?! Other sources suggested using vodka but I'm yet to find 90% proof vodka that is affordable and won't make the house smell like a distillery - also not the scent I'm after. In the end I found a source of perfumer's alcohol which is 95% alcohol and completely unscented.

The next bit was exceptionally easy as I just mixed 230ml of almond oil with 20ml essential oil (I used 10ml grapefruit oil, about 7ml orange oil, and about 3ml of bergamot oil) and 2 tablespoons of the alcohol. After mixing well I poured it into two narrow-necked glass bottles (saved from shop bought reed diffusers) and popped in some fresh reeds.

The grapefruit oil was a very dark orange so that has made the mixture a strong golden yellow but that's in keeping with the colour scheme of the room that they are in so not an issue.


I'm rather chuffed with the results although yet to work out quite how effective they are going to be. They are in the kitchen and I went on to make three batches of curry paste and the kitchen definitely smelled more like the ingredients for curry than 'uplifting citrus'!

Sunday, 21 April 2019

Wild Creations

The last week has seen a wild theme to my creative projects. The first was a result of a mammoth gardening session last Sunday when we tackled a very large cherry tree in the garden which, by the look of it, hadn't been pruned in at least ten, perhaps twenty years. It had a number of large, crossing branches which were rubbing against each other leaving wounds which could easily let infection in. These we removed, along with other low hanging branches. The result was a more healthy looking tree and an enormous space in the corner of the garden. The latter, we quickly realised, was the part of the garden that gets the afternoon and evening sun - perfect for the table and chairs. However, before we could enjoy our new sunny spot, we had rather a lot of tree to dispose of.

The smaller branches went into the garden waste bin and the two largest branches have been saved for a couple of future creative projects (watch this space!). Everything that was too large to be chopped up with secateurs was chopped into 30-40cm lengths and stacked in a gap in the hedge. A simple task that has left me very happy since I now have a wildlife wood pile.


A few days after its creation we spotted the first hedgehog in the garden so I'm hopeful there will be a lot of wildlife that will soon make the most of this new habitat.

Meanwhile, wild garlic is in season and I've been lucky enough to have received deliveries of it in my veg box for the past couple of weeks. My favourite two recipes are very simple. The first is to ferment it as you perhaps would to turn cabbage into sauerkraut. I chopped 100g of wild garlic and 'massaged' in 1g of sea salt (table salt should be avoided as it contains iodine and will kill of any of the good bacteria you need to ferment the leaves). This began the process of drawing water out of the leaves but not to a large extent. I therefore transferred the chopped leaves and salt into a jar and then topped up with bottled spring water (tap water contains chlorine which also kills off the good bacteria and so this too should be avoided). After a week, the smell of garlic had begun to mellow as the leaves gradually fermented. I use a spoonful here and there to add a kick of flavour towards the end of cooking or mixing into mashed potatoes. This will keep for weeks, if not months.


The second recipe is for wild garlic pesto. For this place 100g wild garlic, 50g grated Parmesan or similar salty, hard cheese and 50g pecans, hazelnuts or other nuts of your choice. Blitz in a food processor and then add lemon juice, salt and pepper to taste and enough olive oil until you have your desired consistency.


This makes a fairly large quantity, especially since it is potent stuff! I therefore opted to freeze it in small quantities. I normally use an ice cube tray for this sort of thing (grated ginger, curry paste etc.) but we still haven't managed to locate them following the house move. However, I did find a stack of disposable shot glasses.


Once frozen the blocks of pesto are popped out of the glasses and into a zip-lock bag to be dipped into whenever desired. Both recipes are a great way to extend the rather short period of time when wild garlic can be used in the kitchen. All in all, a few little jobs that will bring pleasure for months to come (hopefully longer for the log pile!)


Sunday, 14 April 2019

Achieving darkness

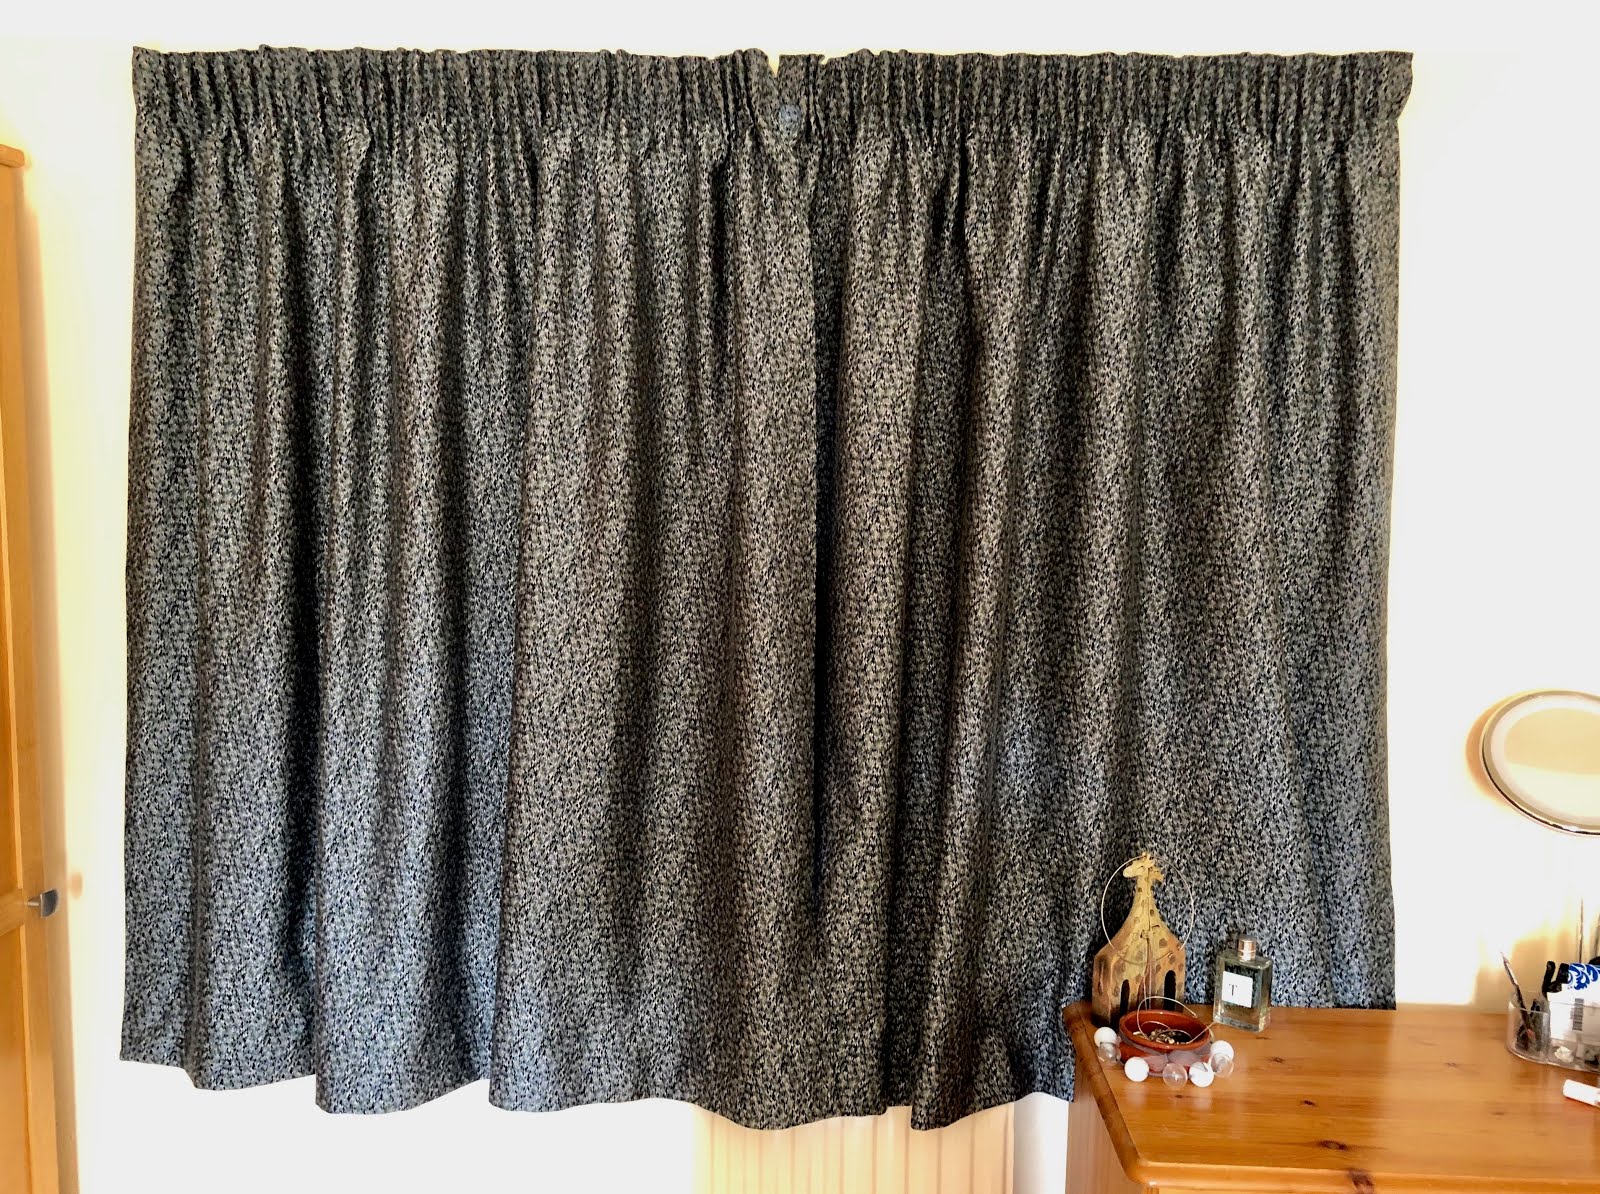
It has been a frenzy of activity at Chez ElleAyJay since the unplanned house move in February. I'm pleased to report that all the rooms now have lined curtains, meaning that sleep past dawn is now possible. Clearly this wasn't a problem in February and March, or at least not during the week when the alarm clock goes off way before sunrise. However, since we moved to British Summer Time at the end of March, the alarm call and sun rise have been having a bit of a race.

All the rooms except for one had re-purposed curtains, which was a huge cost saving even if it did mean altering some hems. However, the last room to get sorted was the main bedroom and the combination of how light sensitive I am and the fact that the inherited curtains were of the palest colour and totally unlined, was becoming a challenge. I think a couple of sheets of tissue paper would have blocked as much light as the curtains and so this became a bit of a mission for me.

A dark fabric was chosen and ordered along with some blackout lining, which is very densely woven and highly effective. With five to six metres of each fabric, the first challenge was to clear enough floor space to measure out each curtain. This achieved, I spent much of last weekend crawling around the floor cutting, pinning, sewing and ironing. The final steps took place yesterday whilst I sat and hand sewed the hems whilst catching up on the week's radio dramas - one of the joys of the home made is the moments of calm like this, followed by the sense of achievement when all is done.


In this case the sense of achievement was doubled when the bedroom remained dark in spite of the beautiful sunshine this morning... sleep undisturbed until the allotted time!

The next task is to make some lampshades but not before we've taken advantage of the beautiful weather today to make a start on taming the garden. The house was empty for eight months before we moved in so we have our work cut out for us. Wish us luck!

Friday, 1 March 2019

Golden Snitch lampshades


2019 is proving to be a busy and momentous year. Not only did I start a new job in January but I also moved house. Rather unexpectedly, I then moved house again last week. Let’s just say, the year’s events have definitely been keeping me on my toes!
Sadly, this has meant little time to exercise the creative muscles. I’ve even been cooking less. However, I’m hoping things are going to settle down a bit and that I can get creative again.

Mind you, this is not to say that I’ve done nothing. I have a friend who also moved house in January and I was determined to put an idea into practice as housewarming presents for her two young sons. Late last year a friend, who is a primary school teacher, was telling me about a lantern parade she was involved in at school and she was getting all the children in her class to make bird themed lanterns. She then also showed me a very basic paper lampshade that she had decorated for her apartment. Both these projects planted a seed in my head which I have been waiting for an opportunity to try out ever since.

My friend’s sons happen to be Harry Potter fans and so the idea of turning a paper lampshade into a Golden Snitch was born. For those not familiar with the Harry Potter stories, a Golden Snitch is a small flying ball that features in the popular game of Quidditch.  The Golden Snitch is released from a box at the start of the game and it is the role of each team’s Seeker to catch it whilst dodging various obstacles which his or her team mates try to protect them from.

In reality – umm… I mean, in the fictitious world of Harry Potter (!) – a Golden Snitch fits into the palm of your hand but a lampshade this size would be no good to anyone. My Golden Snitches were, therefore somewhat larger. They also involved a considerable amount of planning and engineering, with materials being an important factor in how the lampshades were eventually constructed. To be completely honest, they just gradually evolved!


The main body of the Snitch was always going to be a paper lampshade sprayed gold but the wings went through various thought processes and experiments. Card wings seemed difficult to attach to what is a very flimsy and fragile lampshade so that plan was quickly dismissed, and the plan for pipe cleaners and tissue paper turned out to be just too flimsy. In the end I happened across a wipe clean but disposable table cloth in the partyware section of my local supermarket (I have completely forgotten what I was actually looking for at the time). This proved to be far more robust than the gold tissue paper I had but still had the advantage of allowing movement.

With the pipe cleaners being dismissed as too flimsy, the offer of the core wire from a disused coaxial electrical cable was gratefully accepted. Two lengths were cut for each lampshade paying careful attention to get the right proportion of wing size to body (how did we achieve anything before the arrival of Google Images?) and these were further lengthened with a section of pipe cleaner at each end. The object of the pipe cleaner was to give a little more fluidity to each wing tip and also attempt to reduce its ability to poke out an eye!

A wing shape was cut from the folded tablecloth, with the fold planned for the top edge of the wing.  The wing shape was then opened out and the length of wire and pipe cleaner placed along the inside of the fold with about 10cm of wire sticking out as a sort of feather ‘quill’ to attach to the lampshade and the pipe cleaner making up approximately 10cm at the other end - the feather tip.

The wire was then taped in place using double sided tape. The protective strip was then removed from the second side of the tape and the wing folded around the wire to reveal its final shape. All was left to do was to create the wings’ feathers by snipping along the bottom edge.

How to attach the wings had been exercising me a bit but it was the lampshade structure that gave the solution, courtesy of my residential engineer! Each lampshade comes flat packed with a rectangle of wire to insert to help open it out. Fortunately the top edge of the rectangle of wire has three really handy features. The first is a c-shaped piece of wire in the centre which is where you hang the lampshade on the lighting flex that hangs from the ceiling. The other two features are a small triangle of wire sticking up at the top corners of the rectangle for inserting into two small circles of wire in the top of the lampshade which help anchor the lampshade to the rectangular frame.

The wings were easy to attach by threading each bare ‘quill’ wire through the small triangle on either end of the frame and then hooking the end around the c-shaped piece of wire in the centre. This gave them enough of a foundation to stick out rather than droop down.  There was also no trying to attach wire to the fragile tissue paper lampshade. The ability to slot the wings in and out also meant that the Golden Snitches were much easier to transport – believe me, two large and fragile lampshades are a lot easier to fit in the back of a car if they don’t each have two huge wings sticking out of them!

A completed Golden Snitch
I was rather pleased with the end results and just hope that the Harry Potter fans were equally as delighted.

A Snitch in its new home


Friday, 21 December 2018

Merry Christmas

After a manic few weeks I have finally made and delivered all the presents including one or two jars of chilli jam, some marinaded olives, some spicy nuts, and some incredibly cute (even if I do say so myself!) goldfish mittens.


It just leaves me time to say Merry Christmas to one and all and share an image of this year's Christmas decoration.


Have a wonderful Christmas and a peaceful and prosperous New Year.

Thursday, 13 December 2018

Mega Mince Pie

After getting into the Christmas spirit back in September by making Cranberry Chutney and some mincemeat, I decided it was about time the mincemeat got used. Well, some of it at least. I remember making some mince pies with a frangipane topping a year or so ago so dug out the recipe and got baking.

I decided to follow the recipe to the letter, just substituting normal flour for gluten-free. The pastry had the addition of ground almonds, some icing sugar and the finely grated zest of an orange and seemed to be coming together really well.  Since gluten-free pastry is very fragile - gluten gives pastry and dough a stretchy quality that is entirely lacking without it - I always roll it out between two sheets of clingfilm as this helps to keep it all together and also helps when transferring it into any sort of pie tin or flan case. However, my patience was growing rather thin as I attempted to cut out 9cm discs of this very fragile mixture and line deep mince pie tins with it. I was up against the clock as I had a date with a friend, and things weren't going at all well. I had already scrapped two attempts to line just the first of 12 pie 'holes' and the pastry was in danger of being over worked or even thrown in the bin in frustration.  I therefore took the executive decision to make one giant mince pie rather than the more traditional individual ones. Well, the baking process was supposed to be enjoyable and it was rapidly becoming the opposite. I'm also a firm believer in cooking and baking with love for the people I love and things were feeling rather doomed at this point!

A quick re-roll of the pastry on fresh clingfilm gave me a large circle which I easily lifted into a 23cm flan tin. The rest was simple - spread it with a jar of homemade mincemeat and make up a frangipane mixture to cover it, finishing with a sprinkle of flaked almonds.

The mega mince pie came out of the oven (180C or gas mark 4) about 35-40 minutes later and was bundled straight into the car for the drive to my friend's house. I have to admit that my car has never smelt so good! The pie went down a storm and the addition of the orange zest in the pastry was sheer genius. This is definitely a recipe to be repeated!

For the pastry:
125g plain flour, or gluten-free equivalent
50g ground almonds
75g lightly salted butter, chilled and cubed
25g icing sugar, sifted
Finely grated zest of 1 orange
1 large egg yolk (add a bit of the white if using gluten-free flour)

For the frangipane topping:
100g lightly salted butter, at room temperature
100g caster sugar
1 large egg
100g ground almonds
1 tbsp plain flour (or gluten-free equivalent)
A sprinkling of flaked almonds for the top


Friday, 7 December 2018

A simple luxury

Are you familiar with the BBC Radio 4 programme Desert Island Discs? It has been going for years and the format is that of an interview where guests are asked to choose eight discs or music tracks that they would want to have with them if they were to be castaway on a desert island. They also get to choose a book and a luxury item.

After a week in rural Ireland earlier this Autumn - hardly a desert island I know, but bear with me please - where I lost the only lip salve that I had with me on day two and was unable to find a shop that sold any sort of replacement for another 5 days, I swiftly realised that my desert island luxury would have to be a lifetime supply of lip balm.

I am normally the person that has one in every coat pocket, every bag, as well as one in the car and one by the bed. Whilst on the ferry to Ireland I soon realised that the coat I had taken had no lip salve in the pocket (what do they say about making assumptions?) and it is the one that I had in the car that fell out of my pocket on the second day. It may seem ridiculous but I can't tell you how much I missed being able to give my lips a quick slather.

Anyway, after a couple of successful attempts to make my own body lotion I thought I would turn my hand to making some lip balm. The ingredients seem to be very similar to body lotion so it was just a case of adjusting the ratios and the volume. And if you had the ability to make the one thing you realise you really struggle to live without, then why wouldn't you at least give it a go?

Having had this mini project in mind for some time, I had been setting aside any small pot that I thought would be useful. One had contained lip balm, another was a small glass jar that originally contained an ointment and the rest had contained free samples of various beauty products.


The next task was to measure out the solid elements for the lip balm. This was 14g beeswax pastilles, 14g Shea butter and 7g of cocoa butter. These were melted together in a metal jug placed in a pan of water.


It's the beeswax which keeps the balm solid when the room temperature begins to rise, so this took quite some time to melt, but once I had a liquid I then added 26ml of apricot kernel oil, 6ml of caster oil and a few drops of vitamin E. As these oils were cold they instantly solidified half of the melted wax and butters but about a minute in the warm jug, still in the hot water, soon resulted in a clear runny liquid. Removing the jug from the hot water I quickly added 12 drops of sweet orange essential oil and poured the melted butters and oils into my prepared pots where they swiftly began to solidify.


With this new stock of lip balm and the ability to make more in minutes, I'm hoping I'm never going to be without again and will be all set to be castaway. Now I just need to decide on the eight discs and book I will be taking with me... would it be Philip Pullman's His Dark Materials trilogy or the complete novels of Jane Austin...? Hmmm, lots to think about!